Sports Binoculars: The Guide
Guide
You wonder how a shooter, at 50 meters, manages to see their five-shot group as if you were holding it in your hand? It all comes down to the choice of a spotting scope. But between magnification, brightness, and sturdiness, it's easy to get lost. This guide will help you break down what really matters for your practice and your budget.
Key Points to Remember
- The balance between magnification (20-60x) and objective lens diameter (min. 60 mm) is crucial for obtaining a bright and stable image.
- Optical quality (BaK-4 prisms, ED glass, multi-coatings) takes precedence over extreme magnification for sharpness and contrast.
- A robust and suitable tripod is essential to fully exploit your spotting scope, especially at high magnifications.
- Waterproofing and nitrogen purging are non-negotiable features for the instrument's durability outdoors.
- The choice should be guided by your main discipline (shooting, birdwatching, etc.) for optimal ergonomics and performance.
Magnification and Objective Lens Diameter: Finding the Right Balance
This is the number one dilemma. You'll be tempted to believe that stronger zoom, like 60x or more, is necessarily better. Frankly, it's the classic mistake. Excessive magnification, without the objective lens diameter to support it, gives a dark, shaky, and poor-quality image. It's a bit like putting a race car engine on an old cart: it doesn't work.
Everything revolves around the exit pupil. This number, which you calculate yourself (objective lens diameter divided by magnification), determines the perceived brightness. For target shooting or detailed observation in full daylight, aim for at least 2 mm. For twilight, like birdwatching at the end of the day, you'll need a higher number, ideally 4 mm or more.
The Winning Duo for Shooting
For the best spotting scope for shooting, the ideal combo isn't necessarily the most extreme.
- Magnification: A range of 20-60x is very versatile. At 20-25x, you have a wide field of view to quickly locate your target. At 45-60x, you can perfectly distinguish individual shot holes on the target, even at 100 meters. Beyond 60x, atmospheric turbulence and vibrations often make the image unusable, except with truly premium equipment.
- Objective Lens Diameter: This is your light reservoir. For a spotting scope dedicated to shooting, a 60 mm objective lens is an excellent starting point. It offers a good compromise between brightness and weight. For those who also practice in low light or want maximum clarity, an 80 mm is a notable investment, but beware, weight and cost increase.
Table of Concrete Examples
| Primary Use | Recommended Magnification | Minimum Objective Diameter | Why It Works |
|---|---|---|---|
| Target Shooting (50-100m) | 25-60x | 60 mm | Bright enough to see impacts clearly, while remaining portable. |
| General Birdwatching | 15-45x | 65 mm | Wide field for tracking birds, good brightness for undergrowth. |
| Marine Observation | 20-60x | 80 mm | Generous diameter to compensate for haze and glare on water. |
| Long-distance Hiking | 15-30x (fixed) | 50 mm | Lightweight and compactness are key, zoom often unnecessary. |
My personal opinion? Don't listen to the marketing hype about monster zooms. For 90% of users, a good 20-60x on a 60 or 65 mm objective lens is largely sufficient and much more versatile. Investing in medium optical quality at high magnification is often disappointing; a superb 30x is better than a mediocre 60x. And remember: high magnification demands a very stable tripod. Without it, your image will dance like a leaf in the wind.
The Mechanics of a Good Image: Prisms, Glass, and Optical Coatings
You have the right magnification/objective lens duo, but the image lacks pep? It's dull, with colored fringes on the edges? This is where everything is decided. The quality of the internal components makes the difference between "seeing" and "seeing with confounding sharpness". For shooting, where you need to discern the sharp outline of a bullet hole on a white target, it's even more critical.
The Heart of the System: The Prisms
They are the ones that correct the image. Two types dominate:
- Porro Prisms: Shaped like a Z. They generally offer better depth perception and a often more contrasted image for a given price. The downside? The instrument is bulkier and less waterproof by design.
- Roof Prisms: In a straight line. This is the design of all modern, compact and perfectly waterproof spotting scopes. The key here is the prism quality: demand BaK-4, a high-end barium crown glass. The cheap alternative, BK-7, gives a less bright image at the edges, sometimes with a grayish "reticle" effect. For a better sport shooting spotting scope, BaK-4 is non-negotiable.
The Glass War: ED, HD and Fluorite
These marketing acronyms hide a real battle against chromatic aberration – those nasty purple or green fringes on strong contrasts. Imagine them on the edge of a black impact on a white target, it's annoying.
- ED (Extra-low Dispersion) or HD (High Definition) glass are now the standard in the mid and high-end ranges. They significantly reduce this defect.
- Fluorite, even more performant, is the domain of very high-end models. For a regular competition shooter, ED glass is an excellent investment. For occasional hobby use, one could possibly make a concession here, but be aware that perceived sharpness will suffer.
The Alchemy of Coatings: The Magic Layer
A bare glass lens reflects about 4% of the light. In an optical system with 10 lenses, that's a massacre of brightness! Fully multi-coated (FMC) treatments are there to trap the light. On a spotting scope, verify that all air-to-glass surfaces are coated. The gain in brightness and contrast is immediate and palpable, especially in low light. A good coating also eliminates stray reflections – a real plus when observing towards the sun (in birdwatching for example).
As a concrete example, an entry-level spotting scope will often have BK-7 prisms and basic coatings. A mid-range one will offer BaK-4 prisms and multi-coatings on all lenses. The high-end adds ED glass and advanced treatments like hydrophobic coatings (which make water and dirt bead up).
My advice? Don't skimp on the coatings. A good multi-coating system on a standard optic will often give a more pleasing image to the eye than an ED optic with mediocre coatings. The clarity and sharpness you're looking for to analyze your impacts depend on this winning trio: BaK-4 prism, FMC coatings, and, if the budget allows, ED glass.
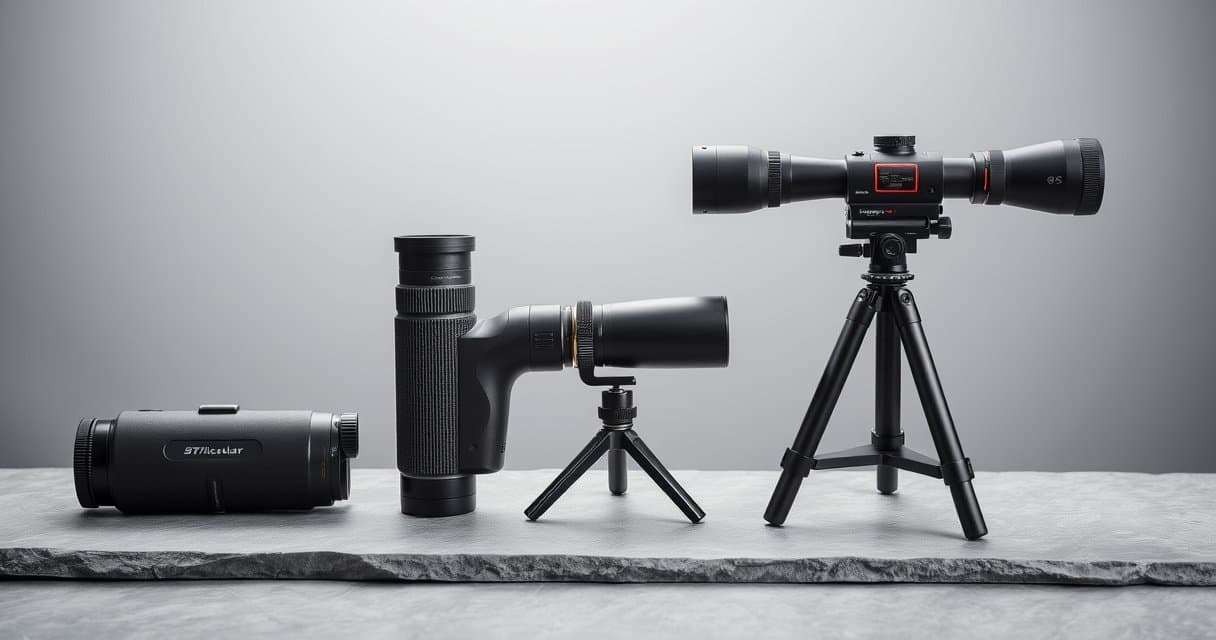
Our Selection
Today we dive into the world of medium and long-range observation with three Svbony spotting scopes from the SV28 range. These models, often recommended for beginners, promise versatility and durability. We have analyzed their technical specifications and synthesized feedback from the user community to help you see things more clearly. Each offers a different compromise between power, brightness, and portability.
| Product | Magnification | Objective Diameter | Waterproof / Fogproof | Community Highlights |
|---|---|---|---|---|
| Svbony SV-28 | 20-60x | 60 mm | IP65 / Yes | Excellent value for money, complete kit. |
| Svbony SV28 (25-75x) | 25-75x | 70 mm | IP65 / Yes | High maximum power, great brightness. |
| Svbony SV28Plus | 15-45x | 50 mm | IP65 / Yes | Very compact and lightweight, versatile. |
Svbony SV-28 (20-60x60mm)

The Svbony SV-28 presents itself as the fully-equipped entry-level model in this selection. On paper, its specs announce reasonable versatility with a zoom covering 20-60x and a 60 mm front lens. Its major advantage, according to user feedback, is its complete inclusion: a small tabletop tripod and a smartphone adapter are included, allowing you to start immediately, whether for observing or capturing a scene.
The community notes that the image quality, thanks to the BAK4 prism and FMC coatings, is overall satisfactory for its segment, offering decent contrast even in low-light conditions. The IP65 waterproof and fogproof construction is also highly appreciated, ensuring peace of mind during outings in humid environments or near water. Reviews highlight that the manual focus is smooth and intuitive, an important point for novices.
However, its limitations must be considered. The included tripod is consistently described as very basic, useful for minimal stability on a table, but completely unsuitable for serious outdoor use. Therefore, investing in a more robust model will be necessary. Furthermore, when pushing the zoom to its maximum (60x), several users report a noticeable drop in clarity and brightness, along with a very narrow field of view. This is classic behavior for entry-level optics, but it's important to know: the maximum magnification is often less usable in daily practice.
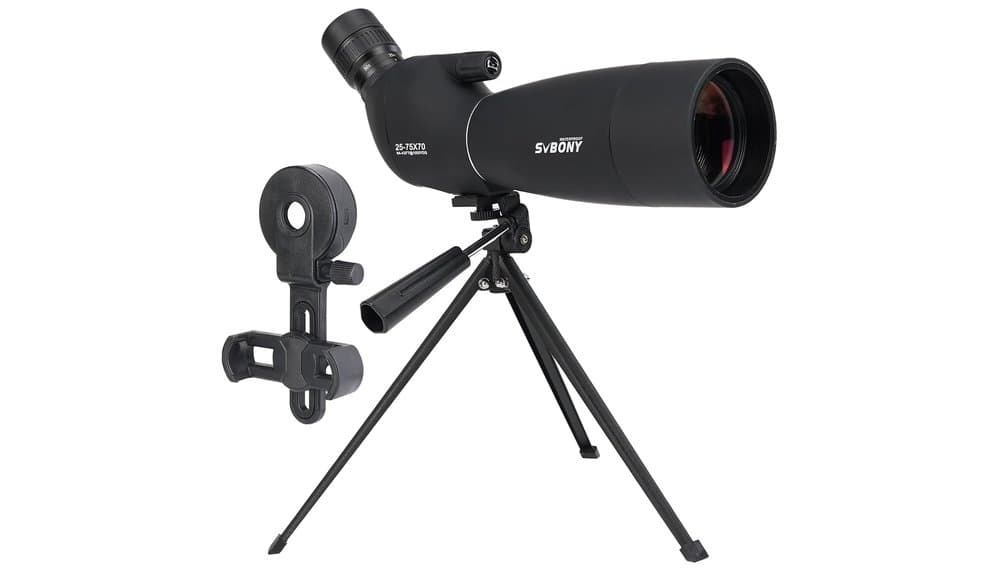
Svbony SV28 (25-75x70mm)

With its 70 mm objective and extended zoom range (25-75x), this SV28 model clearly targets those looking for more power and brightness. Optical theory is simple: a larger objective captures more light. Feedback confirms this trend: users describe an image overall brighter than the 60mm SV-28, which is an advantage in twilight conditions. The ability to zoom up to 75x appeals to those who wish to observe very distant details.
The kit is also complete (smartphone adapter, basic tripod). The construction shares the same IP65 waterproof qualities as its siblings. However, this additional power comes at a cost in terms of user experience. First, the device is heavier and bulkier. Second, and this is a crucial point raised by many reviews, usage beyond 60x becomes very tricky. At 75x, the image is described as very dark, unstable with the slightest movement, and extremely sensitive to atmospheric turbulence (heat haze). This requires a very high-quality tripod and perfect observing conditions.
We thus notice a paradox: the spec sheet boasts 75x, but practice shows that the 25x to 60x range is the most usable and relevant. If you need the extra light from the 70mm, this model makes sense. Otherwise, the gain compared to the standard SV-28 may seem marginal for increased bulk.
Svbony SV28Plus (15-45x50mm)
The SV28Plus takes a different direction by focusing on compactness and versatility. With a 50 mm objective and a zoom starting at only 15x, it is the lightest and most portable of the three. This is a choice that appeals to hikers, amateur birdwatchers on the move, or those looking for a supplementary spotting scope that's easy to slip into a bag.
Its major asset, highlighted by users, is its wide field of view at low magnification (15x). This makes locating targets much easier and quicker than with a model starting at 20x or 25x. It is therefore particularly suited for observing landscapes or birds in an expansive environment. The specific "wine red" FMC finish is noted as effective for improving contrast.
Nevertheless, this compactness implies concessions. The reduced objective diameter (50 mm) means it will capture less light than its 60 and 70 mm competitors. Feedback indicates that in low-light conditions (dense forest, end of day), the image becomes darker more quickly. Furthermore, its maximum magnification is limited to 45x. For observing very fine details at very long distance, it will therefore be less performant than the other models. It's the classic compromise: more lightness and ease of aiming, but less power and performance in low light.
Comfort and Durability in the Field: Ergonomics, Weatherproofing, and Transport
The best optics in the world are useless if you can't hold them steady, if they fog up at the first temperature change, or if their weight discourages you on every outing. This is the "tool" aspect of the spotting scope, and it's crucial, especially for demanding use like target shooting where sessions can last for hours.
Ergonomics: The Focus and Zoom Ring
Turning a stiff or imprecise focus ring is torture. On a firing line, where you need to refine sharpness on minute details, a smooth and precise ring is essential. Test it mentally: good models offer progressive resistance, without play. For the zoom, prefer a ring with grooves or a tactile reference, especially if you wear gloves. Some models offer a fine-focus ring (near the sunshade) for precise adjustments – a real plus.
The eyepiece matters too. Eye relief (the distance at which you can place your eye to see the full field) is vital if you wear glasses. Less than 15 mm can be problematic. A 45° or 90° angled eyepiece is often preferred for prolonged observation (birdwatching, astronomy) as it's more comfortable for the neck, but for shooting, a straight eyepiece can feel more natural for quick target alignment.
Weatherproofing and Nitrogen Purge: A Question of Survival
A spotting scope that is not waterproof and nitrogen-purged is a consumable, not an investment. Moisture and dust are your worst enemies. Weatherproofing is ensured by O-rings on all interfaces. The nitrogen purge (or argon, on high-end models) involves filling the tube with an inert, dry gas before sealing. This prevents internal condensation, the infamous "internal fogging" that kills the optics. This is the standard today on any serious model. Also check the IP protection rating (like IPX7) which guarantees temporary immersion. For outdoor use, by the sea, or in all weather conditions, it's non-negotiable.
Weight and Transport: Everyday Logistics
An 80 mm spotting scope easily weighs 1.5 kg, often more with the eyepiece. Add a sturdy tripod, and you're carrying over 3 kg. For a hike or a long stakeout, every gram counts. Manufacturers use magnesium alloys to lighten the structure without sacrificing rigidity. Ask yourself: will I really carry it for 5 km in the woods? If yes, a more compact model (60-65 mm) can be a smart compromise. If not, prioritize the viewing comfort offered by a large objective lens.
The supplied case is often revealing of the product's philosophy. A simple nylon carry bag is sufficient for club use where the scope goes from the car to the firing line. A rigid, molded case, Pelican-type, is essential for transport in a backpack or on a plane, where shocks are likely. A good attachment point for a strap or lanyard is also worth checking – dropping a spotting scope from your hands is a more common accident than you might think.
Adapting Your Equipment to Your Discipline (Shooting, Birdwatching, Marine Observation)

Choosing a spotting scope is a bit like choosing shoes: what's perfect for hiking will be a disaster on a sailboat. Your optical and mechanical needs change radically depending on what you're observing and where you're observing it. Here's how to avoid making a mistake.
For Sport Shooting: Precision, Stability, and Repeatability
Here, the goal is not to scan a landscape, but to distinguish a 5.6mm bullet hole at 50, 100, or even 300 meters. The spotting scope for sport shooting must be a measuring machine. Magnification is king: a zoom range of 20-60x is standard, allowing you to quickly check an entire target at low power, then zoom in to analyze a tight grouping. But be careful: at 60x, the slightest vibration renders the image useless. A heavy, stable tripod is not an accessory; it's an integral part of the system.
The eyepiece should be straight, for natural and rapid alignment with the sight line. Sharpness at close range (your target) is paramount; some models offer a dedicated "close focus" mode. And above all, frankly, forget low-end astronomy models: the image is often reversed (mirror), which is totally unsuitable. Opt for a near-monolithic construction and a finish that withstands repeated handling on a range, which is often dusty.
For Birdwatching and Wildlife Observation: Versatility and Light
You're pursuing birds in the undergrowth or scanning a pond at sunrise. Your priority is brightness and a wide field of view. An objective lens of 65 to 82 mm captures the slightest glimmer in twilight conditions. A 15-45x or 20-60x zoom offers necessary flexibility, but many experienced birdwatchers prefer a fixed, wide-field eyepiece (e.g., 30x wide), which offers incomparable clarity.
A 45° angled eyepiece is often preferred, as it allows for prolonged observation without neck strain, especially when the target is below or in trees. Weight and bulk become major criteria if you have to carry it all day. A camouflage coating (green armour) can be useful, but good stalking skills remain your best asset.
For Marine Observation and Extreme Conditions: Robustness and Waterproofing
On a pitching boat or on a cliff edge swept by spray, your equipment is subjected to intense mechanical and climatic stress. Waterproofing must be perfect (IPX7 or IPX8) and nitrogen purging is essential to withstand sudden thermal shocks. The construction must be reinforced, often using magnesium alloy, to absorb vibrations and minor impacts.
Optically, good resolution at medium distance (to identify a marine mammal several hundred meters away) and neutral color correction are important. Hydrophobic coatings on external lenses are a major plus: they make saltwater bead up and facilitate cleaning. A long, fixed sunshade protects better from reflections on the water than a telescopic one. And on a boat, a tripod is often replaced by a single-column mount attached to the railing.
The Importance of Support: Choosing and Using a Suitable Tripod
You could buy the best spotting scope in the world; it will be useless without a good tripod. At high magnification, the slightest tremor is amplified disproportionately: your image becomes a shaky soup. A good support doesn't just hold your instrument; it actively stabilizes it. It's the foundation of your observation.
Stability Above All: Weight, Height, and Rigidity
The rule is simple: the heavier it is, the more stable it is. A lightweight aluminum tripod may seem practical for hiking, but it will be severely tested by a light breeze with an 80mm spotting scope. For stationary use (fixed position in sport shooting, ornithological observation), don't hesitate on weight. Look for models whose recommended maximum load capacity is at least double the combined weight of your spotting scope and its head.
Maximum height is also crucial. A tripod that is too low will force you to bend over, straining your back and neck. For prolonged standing observation, aim for a minimum height of 150 to 160 cm without the center column extended. Why without the column? Because extending it radically deteriorates stability. It's often the primary source of vibrations. If you need to gain height, first extend the legs to their maximum.
Choosing the Head: Fluidity vs. Positive Locking
A classic mistake is putting a photo head on a spotting scope. It's a failed marriage. Photo heads are designed for quick, free adjustments, not for the precise, drift-free support of a heavy instrument.
For nature observation, a fluid friction head (or fluid head) is ideal. It allows you to follow a bird in flight or a moving animal with incomparable smoothness, without jerking. The movement is proportional to the force applied.
For sport shooting, it's the complete opposite. You need a head that locks down absolutely fixed and without play, once the target is framed. A geared head, allowing very fine micro-adjustments on two axes, is often the most precise tool for this. It's a significant investment, but one that makes all the difference when analyzing a grouping at 100m.
Materials and Leg Configurations
| Material | Advantages | Disadvantages | Best Use |
|---|---|---|---|
| Aluminum | Lightweight, economical, good rigidity/weight ratio. | Can be cold to the touch, less dampening. | Light hiking, mobile observation. |
| Carbon Fiber | Excellent vibration dampening, lightweight for its rigidity. | Much higher cost. | High performance (digiscoping), windy terrain. |
| Wood | Exceptional natural vibration dampening, aesthetic. | Very heavy, sensitive to moisture, requires maintenance. | Fixed observation posts in nature. |
The leg tips are also important. Rubber feet are perfect for hard, indoor surfaces (shooting range). Removable steel spikes, revealing fine points, are essential for planting the tripod in soft ground or grass. Some models even offer legs with variable angles, allowing for stable setup on sloping or uneven terrain.
One final piece of advice, simple but too often neglected: never hang your bag from the center column hook to add weight. This creates a pendulum that amplifies vibrations. Instead, hang it very low, between the legs, or better yet, place it directly on the ground.
From Entry-Level to High-End: Where to Invest Your Budget?
Unlocking your budget is good. Knowing where to invest it to get the most out of it is better. The price difference isn't just about a simple "it's better." It tells the story of the compromises you make – or refuse to make.
Below 200€: The Limits of Occasional Use
In this range, you're buying a function, not an experience. Advertised magnifications are often ambitious (60x or more), but the image quickly becomes soft and dark once you push beyond 30x. Prisms are often BK-7, with basic optical coatings. It's acceptable for observing a distant landscape from your balcony or for introducing a child, but it becomes frustrating very quickly.
The biggest drawback? The build. Sealing is often questionable ("water-resistant" is not "waterproof"), and nitrogen purging is absent. A cold, damp spell, and you risk permanent internal fogging. Frankly, at this price, if you practice more than once a month, move on. You'll save money short-term, but you'll inevitably buy again.
Between 200€ and 500€: The Kingdom of Best Value for Money
This is where things get serious. For a budget around 300€, you typically gain access to optics with BaK-4 prisms and multi-coatings on all air-to-glass surfaces. Clarity and contrast take a leap forward.
Most importantly, this is the price range where low-dispersion glass (ED or HD) appears. Their benefit is tangible: they reduce color fringing (chromatic aberration) on high-contrast edges, like a white swan on a dark lake or black bullet holes on a white target. It's a radical change for visual comfort.
The build becomes robust, with guaranteed sealing (O-ring) and standard nitrogen purging. It's the perfect category for the regular naturalist or the sport shooter who wants a reliable and durable image without breaking the bank. My advice? If your budget is tight, aim for the top of this range. The difference from entry-level is much greater than the difference between mid-range and high-end.
Above 500€: The Quest for the Last Percent
Here, you pay for perfection and specialization. The gains are no longer revolutionary but refined: superior grade or fluoride ED glass, phase-correction coatings on roof prisms for maximum contrast, focus mechanisms with exceptional smoothness and precision.
For long-range precision shooting, this ultimate refinement is justified. The precision of the focus point, allowing you to clearly distinguish the impact of a .308 at 1000 meters, is priceless for the competitor. Likewise, for advanced digiscoping (photography through the spotting scope), field flatness and perfect chromatic correction make a difference on the camera sensor.
The other major expense is weight and materials. Magnesium alloy bodies, extra-hard glass objective lenses, wide apparent field eyepieces... everything is optimized for maximum performance and durability. You're no longer buying a tool for a few years, but a companion for a decade or more.
The Trap to Avoid: Neglecting Accessories
Splurging on a high-end optic only to mount it on a wobbly 50€ tripod is the worst mistake. Your overall budget must absolutely include a worthy support system. A simple rule: allocate at least 30% to 40% of your spotting scope's cost to the tripod + head combination. An excellent 800€ optic on a poor support will yield worse results than a 500€ optic on a good support. It's a system, treat it as such.
Conclusion
Excellent. You are now equipped with the keys to choose the right sports spotting scope.
Keep this in mind: a great optic is not the one with the biggest number engraved on it. It's the one that disappears between your eye and the spectacle, whether it's a griffon vulture or a perfect shooting group.
Get out in the field, test, compare. Your vision and your practice are unique. Trust them. Happy observing!
Frequently Asked Questions
Which spotting scope for sport shooting at 100m?
For sport shooting at 100m, a 20-60x combination with a 60 mm objective lens is ideal, as it offers a wide field to locate the target and high magnification to see the impacts clearly, all with good brightness.
What is the best magnification for a spotting scope?
The best magnification is a compromise; a 20-60x range is versatile for most uses, as beyond 60x, atmospheric turbulence and vibrations often make the image unstable without a very stable tripod and high-end equipment.
What is the exit pupil on a spotting scope?
The exit pupil, calculated by dividing the objective lens diameter by the magnification, determines the perceived brightness: aim for at least 2 mm for use in full daylight and 4 mm or more for low-light conditions like dusk.
BaK-4 or BK-7 prism, what's the difference?
Prisms made of BaK-4 glass offer a brighter, higher quality image, especially at the edges, while BK-7 prisms, being less expensive, can produce a less bright image sometimes with a grayish effect; BaK-4 is recommended for serious use.
Is a tripod mandatory with a spotting scope?
A stable tripod is absolutely essential, especially at high magnifications, because the slightest vibration is amplified and makes the image shaky and unusable; it is the foundation of the observation system.
Should you get a waterproof spotting scope?
Waterproofing and nitrogen purging are essential to protect the instrument from moisture and dust, preventing internal fogging and ensuring its durability, especially for outdoor use in all weather conditions.
100% free and independent — All our articles are written independently, without any sponsorship. We may earn a commission on purchases made through our links, at no extra cost to you.
Guides you might like

Astrophotography Telescope Buying Guide
Choose the right telescope for astrophotography to avoid frustration. Key factors depend on your target nebula or object.

Best Binoculars Value Guide
Find value binoculars that match your real needs. Understand specs like 8x42 and key features for the best observation without overspending.

Best Nature Binoculars Kids
Discover how to choose the perfect first binoculars for a child, focusing on lightweight design, ergonomics, and sparking a love for nature observation.
Articles you might like

Bresser Junior 6x21 Binoculars Review
Discover the ideal first binoculars for kids. Bresser Junior 6x21 offers robust, simple optics to spark a lifelong love for nature exploration.

Adjustable Latitude Equatorial Wedge Review for Telescopes
Precision equatorial wedge for telescopes & astrophotography. Converts photo tripods into stable tracking platforms for celestial photography.

K&F CONCEPT Tripod & Extension Arm Review
Review of K&F CONCEPT tripod with extension arm for versatile smartphone & camera photography and video creation. Our hands-on analysis.