Top 5 wildlife photography traps
Guide
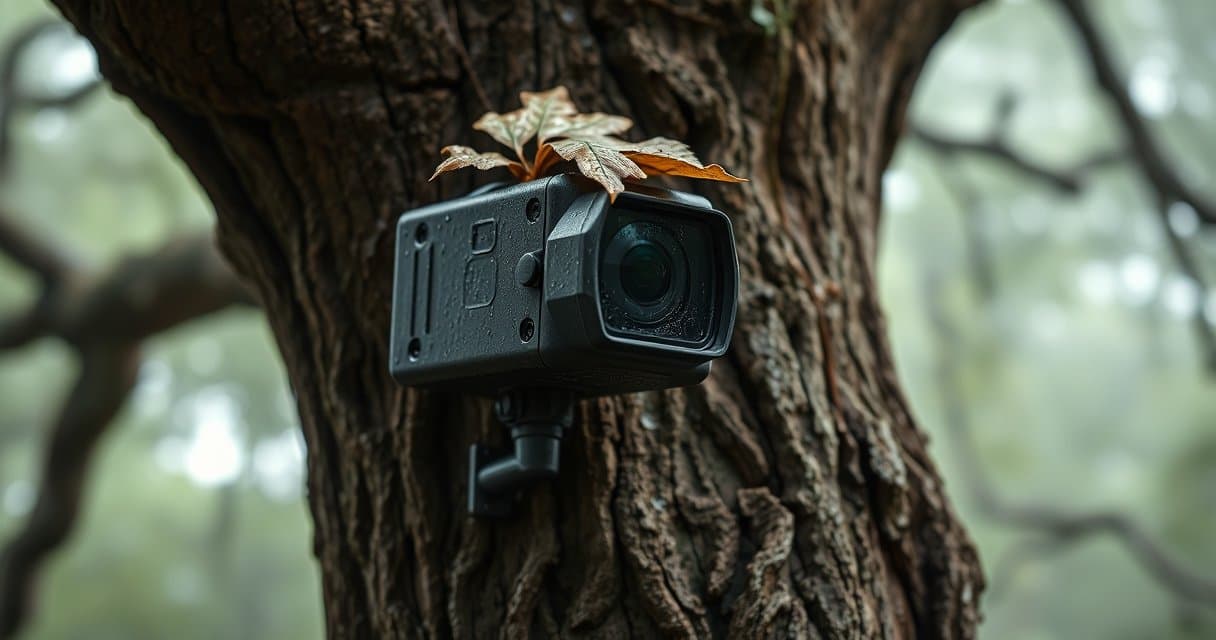
You have carefully placed your camera trap, full of hope, and you end up with a hundred shots of moving branches… and zero animals. Wildlife camera traps are a fantastic tool for uncovering nature's secrets, but they can also lead to many disappointments if certain crucial parameters are neglected. It is often believed that simply hanging the box on a tree is enough, but to truly observe wildlife without disturbing it and get results, a few tricks make all the difference. Let's look together at how to avoid common pitfalls.
Key Points to Remember
- Trigger speed (ideally <0.5s) is the most important criterion for capturing the animal and not just the scenery.
- A waterproof housing (IP65 minimum) resistant to condensation is essential for reliability in the field.
- Battery life is managed by choosing the right batteries (lithium for winter) and avoiding power-hungry modes like photo bursts.
- Strategic placement (height adapted to the species, 45° angle, adjusted sensitivity) is as crucial as the quality of the trap itself.
- Prioritize effective night vision over connectivity, which is often expensive and energy-hungry, unless you have a specific need for real-time monitoring.
Responsiveness: The Number One Criterion for Capturing the Animal, Not the Scenery
This is THE most common and frustrating trap: you retrieve the memory card, your heart beats a little faster, and... you discover a superb photo of a deer's tail disappearing, or worse, a perfectly framed shot of an empty location. The animal is already gone. The fault lies with a trigger delay that is too long. For the best wildlife camera trap, trigger speed is not just a technical specification; it is the essential condition for getting anything other than landscapes.
Concretely, what are we talking about? The delay between the moment the sensor detects heat motion (the PIR) and the moment the shutter triggers. On low-end or older models, this delay can easily reach 1.5 to 2 seconds. Imagine: a fox trotting at 8 km/h. In two seconds, it has covered more than 4 meters. It's already out of the frame!
For reliable results, you must aim for an advertised reaction time of 0.3 to 0.7 seconds. Below 0.5 seconds is truly ideal for freezing rapid movements. Some high-end models even reach 0.1s. This performance changes everything: you capture the animal in the center of the image, often in an interesting posture.
Video Doesn't Compensate for Everything
A common misconception? "I'll set it to video mode, so I don't miss anything." Be careful. The start of video recording also has a latency period, often even longer than for photos! And your files will quickly become unmanageable. The trick: use the "photo + video" mode if your trap allows it. It takes an immediate photo (this is what captures the crucial moment), then follows up with a few seconds of video for the behavior. It's the best of both worlds.
Frankly, what's the point of a 30-megapixel sensor if your device is as slow as a snail? Who cares about having a perfect image of a branch. The primary objective is to document the presence and comings and goings of wildlife. Always prioritize the spec sheet that clearly shows a fast "trigger time," even if it means giving up ultra-high resolution. Your patience in the field deserves better than a collection of empty photos.
Weather Resistance and Durable Field Installation
Your trail camera will live a tough life. For weeks, it will have to endure driving rain, morning frost, wind-blown dust, and sometimes even the overly keen interest of a wild boar rubbing its back against the tree. A housing that lets in water or whose seals fail at the first cold snap is a guarantee of losing your investment and all your data. The best wildlife camera is first and foremost a survivor.
Don't just rely on pretty marketing promises. Look for the concrete figure: the IP rating (Ingress Protection). For year-round outdoor installation, aim for a minimum of IP65. This means it is protected against dust (the "6") and against water jets from a nozzle ("5"). This is the bare minimum. Even better, an IP66 or IP67 rating offers additional peace of mind against torrential rain or accidental immersion in a puddle. If the manufacturer only mentions "waterproof" without a number, be very wary.
The Invisible Enemy: Internal Condensation
Rain, we think about. But the worst camera killer is often moisture that seeps in and then condenses inside the housing, on the lens glass, and on the electronic circuits. Result: permanently blurry photos, as if taken through fog, followed by a fatal short circuit. The technical solution is nitrogen purging or very high-quality sealing gaskets. These housings are sealed with a dry, inert gas that prevents any fogging, regardless of the sudden temperature changes between night and day.
A practical tip worth its weight in gold: before you go to install your camera for a month, do the freezer test (without the batteries, obviously!). Place it in an airtight plastic bag, put it in the freezer for 20 minutes, then take it out into your kitchen at room temperature. If there is condensation on the inside of the lens glass, send it back to the store. It won't last a week in the forest.
And don't forget the mount! A cheap nylon strap, exposed to the sun, becomes brittle as glass within a few months. Prefer wide polyester straps that are UV-resistant or, better yet, a mounting system with a steel cable and a sturdy padlock. A small tube of silicone grease on the battery compartment seals before each installation session can also extend the life of your equipment by several years. It's a detail, but it's what makes the difference between a gadget and a reliable tool.
Our Selection
Do you want to observe wildlife, secure a garden, or simply capture the secret life of nature? Hunting or "trail cameras" have become accessible and high-performing tools. In this selection, we have analyzed three popular models, each with its strengths and specificities, to help you see things more clearly.
| Product | Video Resolution | Night Vision & Range | Detection Angle & Speed | Key Strengths |
|---|---|---|---|---|
| CEYOMUR CY50 | 4K/30fps | 850nm (visible LEDs), 36 LEDs | 90°, Fast Trigger | Well-equipped entry-level, integrated screen, easy installation |
| HAZA 2.7K | 2.7K | 940nm (invisible), 34 LEDs, 20m | 120°, 0.1s | Discreet at night, wide angle, ultra-fast trigger |
| HAZA PR907W | 4K/64MP | 940nm (invisible), 30m | 120°, 0.1s | WiFi/Bluetooth connectivity, dedicated app, 32GB SD card included |
CEYOMUR CY50 Hunting Camera
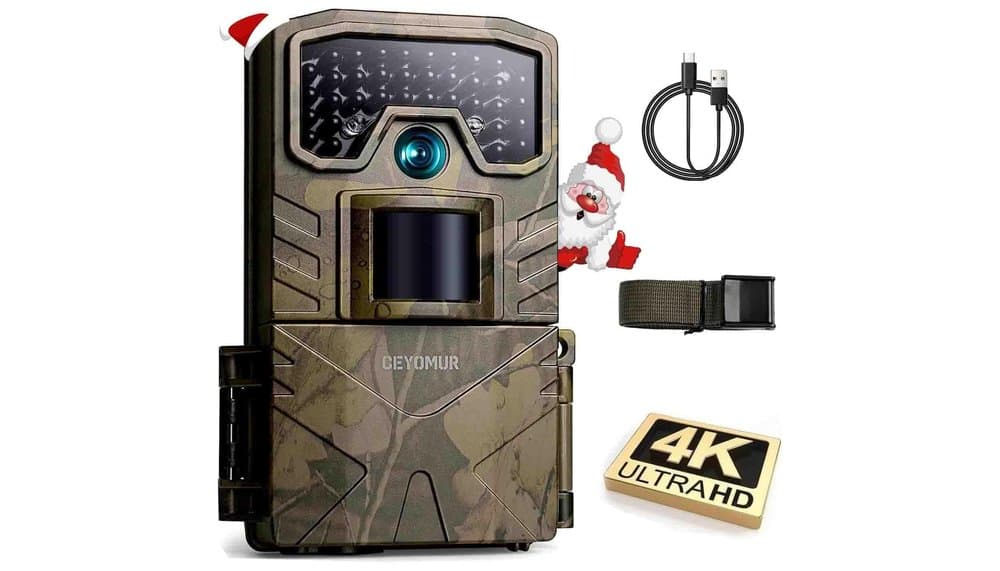
The CEYOMUR CY50 presents itself as a well-equipped entry-level model that bets on complete features for versatile use. On paper, its specs promise 4K video at 30fps and 48-megapixel photos, which is, in theory, largely sufficient to clearly identify passing animals. Its integrated 2-inch LCD screen is a real plus according to user reviews, as it allows for quickly viewing footage on-site without removing the SD card.
Community feedback confirms that this model is appreciated for its simple handling, ideal for beginners. Its IP66 waterproof rating and integrated design seem to protect it well from the elements. However, some points require attention. Its night vision uses 850nm infrared LEDs, which emit a faint reddish glow visible to the human eye and some animals. According to experienced users, this can sometimes alert wary animals, limiting its completely discreet nature at night. Another point highlighted: the 90° detection angle is more restricted than its competitors', which may require more precise positioning to cover a wide area.
In conclusion, the CY50 is a solid choice if you're looking for a reliable and complete first camera, especially for primarily daytime use or if absolute nighttime discretion is not the number one criterion. Its ease of installation and the presence of the screen are its main arguments compared to more spartan models.
HAZA 2.7K Hunting Camera
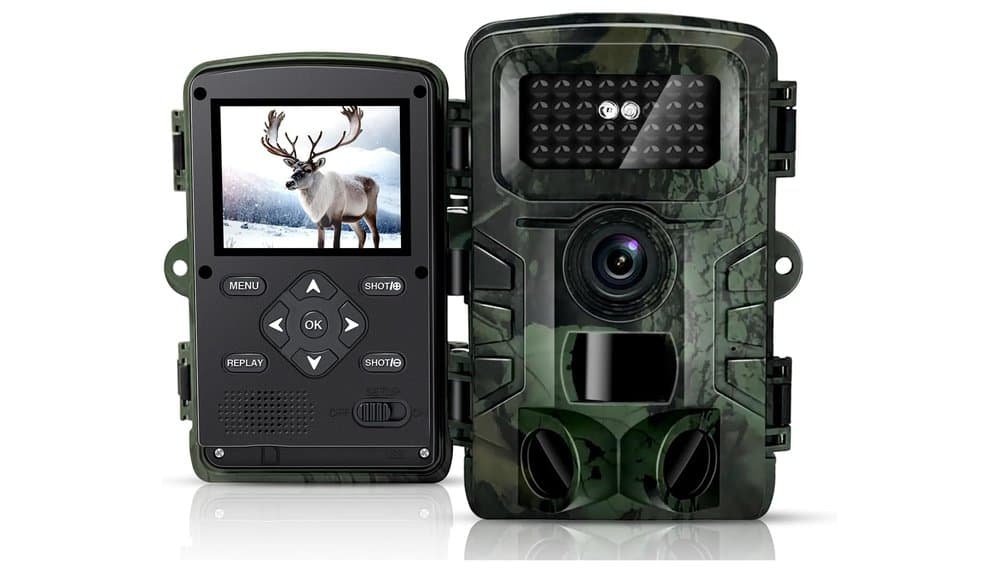
The HAZA 2.7K model, as its name suggests, focuses on qualities other than maximum resolution. Here, the compromise seems to be made in favor of discretion and responsiveness. Its main strength lies in its 940nm infrared LEDs, completely invisible to both animals and humans, allowing for perfectly stealthy nighttime surveillance. Coupled with this, its ultra-fast trigger speed of 0.1 seconds, as described by the brand, is a strong argument for not missing the quick passage of an animal.
The community also notes its wide 120° detection angle, which offers a very broad field of vision, ideal for monitoring a clearing or trail without having to use multiple devices. On paper, the advertised battery life seems excellent, with up to 6 months on standby thanks to 8 AA batteries. However, its limits must be considered. The 2.7K video resolution, while very decent, is below the 4K offered by other models in this selection. Furthermore, this model does not have wireless connectivity: you must physically retrieve the SD card to view the media, which can be a constraint for a very remote or frequently checked installation.
This camera is therefore made for the user who prioritizes above all the discipline of nighttime stealth and extreme responsiveness, and who is not bothered by manual file exchange. It's a robust and effective field tool, designed to run for a long time without intervention.
HAZA PR907W
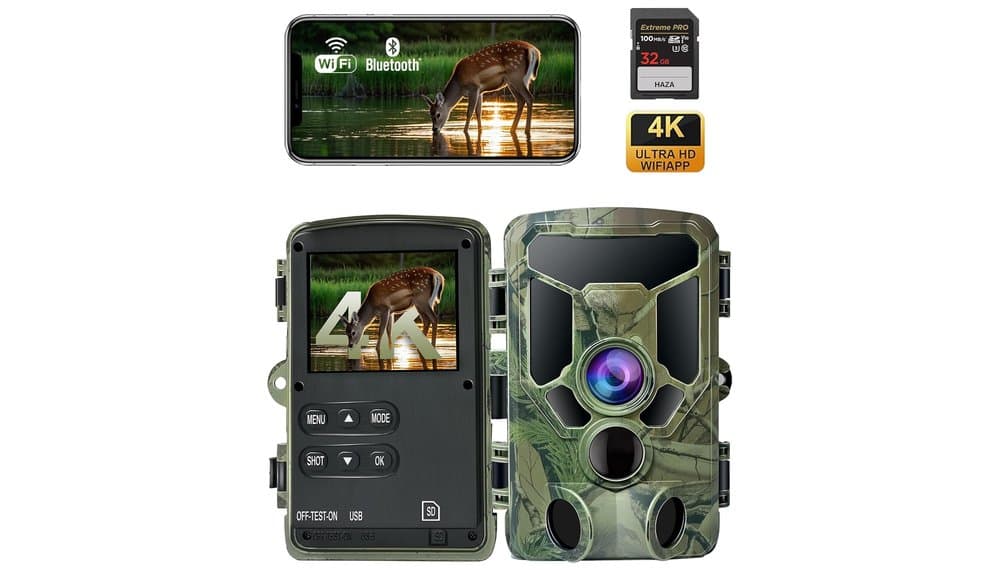
The HAZA PR907W represents the connected high-end of this selection. It combines the best technical characteristics with practical remote management. On paper, it aligns 4K/UHD resolution with a 64MP sensor, invisible 940nm night vision (30m range), a 0.1s trigger speed, and a wide 120° angle. But its true differentiator is its WiFi 6 and Bluetooth 5.2 connectivity, managed by a dedicated smartphone application. This radically changes the user experience.
Reviews highlight the immense advantage of being able to control the camera remotely, change its settings, receive alerts, and especially download photos and videos directly to your phone without touching the device. This minimizes trips to the site and reduces scent disturbances, a major asset for not scaring game over time. The fact that a 32GB SD card is included is also a non-negligible practical detail. However, this sophistication has a corollary. Battery management with WiFi enabled is a point of vigilance; according to feedback, battery life can decrease significantly if remote connections are very frequent. Furthermore, this connectivity adds a layer of complexity (access point configuration) that may deter purists wanting a totally basic "set and forget" device.
The PR907W is therefore aimed at those who seek maximum technical performance coupled with the comfort of connectivity. It's the ideal tool for the naturalist monitoring a specific site, the hunter wanting to optimize their watch without moving, or for anyone wanting modern, interactive property surveillance.
Managing Battery Life to Minimize Disturbance
Nothing is more frustrating than discovering your camera trap shut down in the middle of the week, right after a rare animal passed by. Worse, every trip to the field to change batteries is an intrusion. You leave your scent, crush vegetation, disturb the area. The goal is to be forgotten for as long as possible.
Autonomy is not just about the number of batteries. It's a complex equation between the device's power consumption, battery type, weather conditions, and, most importantly, your settings. A trap that takes a burst of 3 photos and a 30-second video every time a squirrel passes will drain its batteries in record time. Frankly, unless you are tracking a very specific animal, this mode is a battery killer. For routine surveillance, a single good-quality photo is often enough.
The Crucial Choice of Batteries
Here, there is a real debate. Standard alkaline batteries are a false good idea in cold weather: their voltage drops dramatically as soon as the thermometer falls below 5°C, which can disrupt detection and cut your session short prematurely. Lithium (non-rechargeable) batteries are the kings of autonomy and cold resistance. They cost more upfront, but they last 3 to 4 times longer, especially in winter. For rechargeable batteries, prioritize Low Self-Discharge models (like Ni-MH LSD). They hold their charge much longer in storage, which is perfect when you prepare your gear in advance.
Here is a quick comparison to give you a rough idea, based on similar use (a few triggers per night, mild temperatures):
| Battery Type | Advantages | Disadvantages | For Whom? |
|---|---|---|---|
| Alkaline | Low initial cost, available everywhere. | Very sensitive to cold, average autonomy. | Occasional use, short duration in warm season. |
| Lithium (Primary) | Maximum autonomy, excellent performance in cold (-20°C). | High unit cost, environmental impact. | Long winter sessions, remote sites. |
| Ni-MH (LSD) Rechargeable | Economical long-term, rechargeable. | Lose some charge over time, initial investment. | Regular users who can recharge. |
Also, consider solar power! A small external solar panel, even a modest one (like 5W), can maintain a supplemental charge on internal batteries or a powerbank. It's a game-changing investment for a fixed installation over several months, transforming your trap into a truly autonomous observatory. For me, it's a key feature of the best wildlife camera trap for serious study: the ability to last over time without your intervention.
Don't forget the Smart Standby mode. Some more advanced models can disable sensors during hours of high daytime activity (if you only target nocturnal animals) or reduce the frequency of checks. This saves precious resources. Finally, one last piece of advice: before a long session, always clean the battery contacts with a dry cloth. Minor corrosion can sabotage the best battery life.
The Installation Strategy: Angle, Height, and Detector Sensitivity
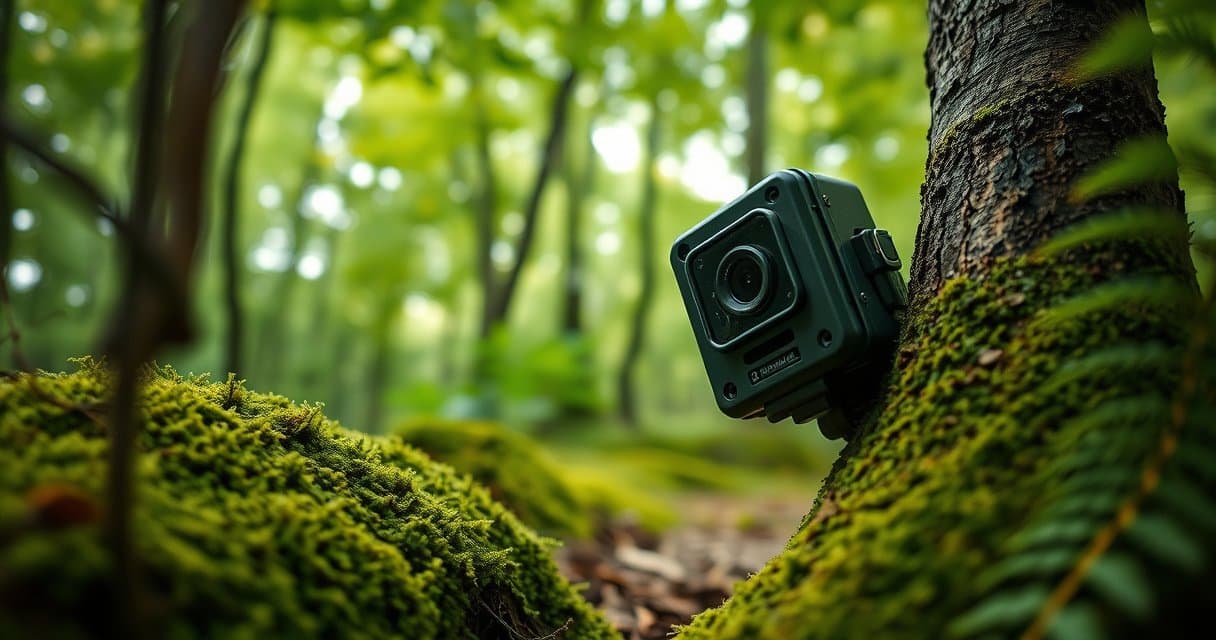
Placing your camera trap one meter off the ground, facing a bush, and setting it to maximum sensitivity? That's the perfect recipe for getting 5000 photos of wind in the leaves and no animals. The real magic of trail camera photography doesn't start when you leave, but the moment you attach the unit to the tree. It's a matter of logic and anticipating animal behavior.
Height: Getting on Their Level
Height is your first lever. For a roe deer or wild boar, a height of 60 to 80 cm above the ground is ideal. That's roughly the height of their flank. For a fox or badger, lower it to 40-50 cm. For ground birds (grouse, pheasants), 20-30 cm is enough. The classic mistake is placing it at human height for convenience: you'll mostly get photos of backs or hindquarters. Also consider the slope of the terrain. If the animal is coming from below, you may need to lower it a bit more. It's precision work.
The Angle of Approach: Avoiding the Green Wall
Never aim directly at a dense wall of vegetation at close range. The motion detector can be triggered by the slightest rustle, and the animal, even if present, will be hidden. Instead, look for a natural travel corridor: the edge of a trail, the entrance to a den, a clearing, a watering hole. Orient the camera slightly diagonally to the path, not perpendicularly. This increases the area covered by the sensor and gives the camera an extra fraction of a second to trigger before the animal has already passed. An angle of about 30 to 45 degrees relative to the path is often perfect.
Sensitivity Setting: Your Best Ally Against False Positives
This is THE most underestimated parameter. Maximum sensitivity in a forest in summer is a nightmare. You'll be overwhelmed with photos of moving leaves. Always start with a medium setting. Test it by walking in front of the camera at the speed and distance expected for the animal. Then adjust. In very "active" areas (tall grass, branches), lower the sensitivity. In winter, on a bare path, you can increase it. Some high-end traps offer a target size setting, allowing you to ignore small movements (leaves) and only trigger on larger masses (an animal's body). This is a feature that radically changes the quality of your data harvest.
On-Site Testing: Don't Leave Blindly
After mounting and setting your camera, don't leave the site immediately. Make several passes yourself, at different speeds, entering the detector's field from different angles. Check on the screen (or on the first test photos) that you are well framed and that detection works as intended. This is also the time to check for obvious sources of disturbance: a branch that will whip in the wind right in front of the lens, a puddle that could reflect the sun and trigger the thermal sensor, or a secondary trail you had forgotten. This fifteen minutes of checking will save you weeks of disappointment.
Frankly, the best wildlife camera trap in the world will yield mediocre results if poorly installed. Technology does not compensate for a poor field strategy. Take your time. Observe the tracks, droppings, worn paths. Installation is 50% of the success.
Should You Choose a Connected Model or One with Advanced Night Vision?
This is the dilemma of the modern wildlife photographer: invest in a camera trap that sends you live images on your phone, or in a device that sees perfectly in the deepest dark? Both technologies are appealing, but they meet radically different needs. Making the wrong choice often means wasting a significant budget on a feature you'll never end up using.
The Connected Trap: For Real-Time Monitoring (and Peace of Mind)
Connectivity is usually via a GSM module (with a SIM card) or short-range Wi-Fi. The former is clearly more useful for use in the wild, far from your internet router. Imagine monitoring a fragile breeding area without ever setting foot in it, or being instantly alerted if a rare species crosses your property. For scientific study or precise game management, it's revolutionary. You receive a photo via MMS or an app, and you can decide whether to intervene or not without disturbing the site.
But be careful, it's also the most energy-hungry. Sending a photo consumes much more power than taking and storing it. You therefore need a reliable solar power source or high-capacity batteries, otherwise you'll be changing them every week. And let's be honest: if your goal is simply to know the fauna in your woods over the season, is it really useful to know within the hour that a roe deer passed by? Often, it's just a gadget that multiplies costs and complexity.
Advanced Night Vision: For Seeing in Total Darkness
All traps have black or red LEDs for night use. But quality varies enormously. Here we are talking about models equipped with high-power low-glow LEDs (black) and, increasingly, sensitive image sensors that capture more light (e.g., "Starlight" CMOS sensors). The difference? With a basic model, you'll get a grainy, blurry night photo of an animal at 5 meters. With a model equipped for advanced night vision, you can identify an individual, distinguish details of its coat, and get a usable image up to 20 or 25 meters, all without frightening wildlife with a visible flash (black LEDs are invisible to most mammals).
Who is this essential for? For those studying strictly nocturnal species like badgers or genets. For those whose terrain is so dense that shots inevitably happen at nightfall. Or for the photographer who wants impeccable image quality, 24/7. It's an investment in the quality of data and images, not in instantaneity.
So, How to Decide?
Ask yourself two very simple questions:
- Do I urgently need to know the information, or can I wait for my monthly visit? If it's urgent (surveillance, poaching, alert), connectivity is essential.
- Are my target species mainly active during the day or at night? If at night, absolute priority to night performance. A good sensor and powerful LEDs will do much more for your success than an SMS.
My opinion? For the majority of amateur naturalists, a limited budget is much better invested in a trap offering excellent night vision and great reliability, rather than in connectivity. Because ultimately, the best camera trap for you is the one that meets the essential need: capturing clear, usable images of wildlife, at any hour, without breaking down. The magic is discovering the images on-site, like opening a gift. Connection is often a matter of comfort – a comfort that is sometimes very expensive and finicky.
Conclusion
There you have it, you are now equipped to avoid the main pitfalls of wildlife camera trapping. It's not just about the camera body or the sensor.
It's a matter of patience, preparation, and common sense. A matter of knowing the terrain, above all.
Go ahead, set up your device. Test, adjust, learn. The forest awaits you, full of secrets to reveal. Happy hunting... for images!
Frequently Asked Questions
What is the ideal trigger time for a trail camera?
A trigger time below 0.5 seconds is ideal, as a delay of 1.5 to 2 seconds allows an animal to leave the frame. Prioritize models with an advertised responsiveness between 0.3 and 0.7 seconds.
How to avoid blurry photos due to condensation?
Internal condensation is a common problem that ruins images. Opt for a housing with a minimum IP65 rating and nitrogen purge technology to prevent fogging on the lens.
What is the best height to install a trail camera?
The ideal height varies depending on the target species: about 60-80 cm for deer, 40-50 cm for foxes or badgers, and 20-30 cm for ground birds. Avoid placing it at human height.
Should I prioritize a connected camera or one with advanced night vision?
Choose connectivity (GSM) if you need real-time alerts for surveillance or scientific studies. Prioritize advanced night vision with powerful no-glow LEDs if your target species are mainly active at night.
How to adjust the detector sensitivity to avoid false triggers?
Always start with a medium sensitivity setting and test it by walking in front of the camera. In very active areas (tall grass), lower the sensitivity to avoid hundreds of photos triggered by the wind.
Which batteries offer the best autonomy for a trail camera in winter?
Lithium batteries (non-rechargeable) offer the best autonomy and cold-weather performance, being 3 to 4 times more effective than alkaline batteries in winter conditions. For regular use, Low Self-Discharge Ni-MH batteries are also a good rechargeable choice.
100% free and independent — All our articles are written independently, without any sponsorship. We may earn a commission on purchases made through our links, at no extra cost to you.
Guides you might like

Astrophotography Telescope Buying Guide
Choose the right telescope for astrophotography to avoid frustration. Key factors depend on your target nebula or object.

Best Binoculars Value Guide
Find value binoculars that match your real needs. Understand specs like 8x42 and key features for the best observation without overspending.

Best Nature Binoculars Kids
Discover how to choose the perfect first binoculars for a child, focusing on lightweight design, ergonomics, and sparking a love for nature observation.
Articles you might like

Coolifepro SV-TCQW WiFi Trail Camera Test
Coolifepro SV-TCQW WiFi trail camera review: analyzing its specs, user feedback, and performance for modern, connected wildlife surveillance.

Bushnell Legacy 10x50 Binoculars Review & Test
Review of the Bushnell Legacy 10x50 binoculars. Analysis of its versatility, robustness, and optical quality for various observation activities.

BOSSDUN GN0039 Telescope: In-Depth Testing & Review
BOSSDUN GN0039 telescope review: 80mm scope with 25-75x zoom, tripod & phone adapter for birding, hunting & astronomy. Entry-level analysis.