Night Vision IR Camera Trap Guide
Guide
Do you dream of capturing the discreet passage of a fox or a badger in the dim light, without disturbing them? Choosing the right infrared trail camera makes all the difference between blurry images or sharp memories. Frankly, it's not just a matter of megapixels; the essentials lie in the quality of the IR flash, the responsiveness of the detector, and the battery life that allows it to last for weeks in the forest. We'll guide you to see clearly.
Key Points to Remember
- Night image quality depends primarily on the power and type (no-glow) of the infrared flash, not the number of megapixels.
- A fast trigger speed (less than 0.5s) and fine-tuning of the PIR detector are essential to not miss animals.
- Prioritize a waterproof housing (IP66 minimum) and lithium batteries for reliability in the field and long battery life.
- Adapt your choice and settings to your terrain: long detection range for open spaces, ultra-fast trigger speed for dense environments.
What Makes a Night Image Good?
That's the big question. Because frankly, seeing ads with "20MP" in big letters on the box is often a trap. At night, the real hero isn't the image sensor, it's the infrared system. Forget about megapixels for a minute.
IR Illumination: The Heart of the System
This is where everything is decided. A good infrared flash isn't just a series of small red LEDs. You need to look at three things: range, power, and emission type.
- Range (in meters): This is the distance up to which your subjects will be illuminated. A model with 15m range is perfect for a narrow forest path. For a clearing, aim for 25m or more. Be careful, this advertised range is often measured under ideal conditions; in the field, with a bit of mist or vegetation, it decreases.
- Power (in number of LEDs and their type): The more LEDs there are, and the more performant they are, the better. But the real trick is the emission type. 'Low-glow' LEDs emit a reddish glow barely visible to humans, but which some animals can perceive. 'No-glow' or 'black LEDs' are completely invisible. This is my choice to avoid risking scaring the most wary species like wild boars or mustelids.
- The quality of the optics in front of these LEDs is just as crucial. Powerful LEDs behind a cheap lens will give uneven lighting, with bright spots and shadowy areas.
The Sensor and Image Processing
Now, let's talk about the sensor. Yes, it's important. A quality 12MP sensor, paired with a good image processor, will give a much better result than a low-end 20MP sensor. At night, the sensor works with very little light (from the IR LEDs). It must therefore be sensitive, and the software must know how to reduce "digital noise" – those colored grains that spoil details.
For night video, it's even more demanding. Prioritize a Full HD resolution (1080p) with a good bitrate (the amount of data per second) over a pale, pixelated 4K. A clean, well-defined 1080p video is a thousand times better.
The Trap to Avoid: False Positives and Empty Triggers
Nothing is more frustrating than finding your SD card full of 500 photos of moving grass. The quality of your night image also depends on the accuracy of the PIR sensor (the one that senses heat and movement). If it's poorly adjusted or too sensitive, it will trigger on temperature changes due to sun or wind, giving you black or blurry photos. A good trail camera allows you to adjust the PIR sensitivity. For an installation on the edge of a windy woods, lower it. In a calm game trail, increase it.
Detection Speed and Accuracy: Miss No Subject Ever Again

Imagine this: a deer crosses your field of view. Between the moment the detector sees it and the moment the shutter fires, it has already taken three leaps. The result? A superb photo... of its tail disappearing into the underbrush. It's a nightmare. The quality of detection is what separates a reliable device from a frustrating gadget.
Trigger Speed, the Key Metric
It's simple: the lower it is, the better. We're talking about the delay, in milliseconds, between motion detection and the capture of the first image.
- Below 0.3 seconds: This is the realm of high-end devices, essential for birds in flight or lively small mammals like squirrels.
- Between 0.3 and 0.7 seconds: This is the standard range for good mid-range models. It's perfect for most large mammals (wild boar, foxes, deer) moving at a normal pace.
- Above 1 second: Be cautious. This might suffice for a stationary animal, but you risk missing the majority of dynamic action.
A practical tip: if you're targeting birds at a feeder, prioritize burst mode. Fast triggering coupled with a sequence of 3 to 5 images in a row drastically increases your chances of getting the perfect shot.
The Art of Adjusting the PIR Detector
Detection isn't just about speed. It's mainly about intelligence. Two parameters are your best allies: sensitivity and shot interval.
- Sensitivity: A setting too high (HIGH) on a windy trail will fill your SD card with photos of moving leaves. A setting too low (LOW) will let a discreet badger pass by without a sound. You need to test. Start with a medium level and adjust after a night of testing.
- Interval: This parameter determines the mandatory wait time between two series of photos. Set it to 1 or 2 seconds if you want to track an animal's progression. Set it to 30 seconds or a minute to avoid saturating the memory with 200 photos of the same deer grazing for a quarter of an hour.
Detection Angle and Range: Seeing Wide, Seeing Far
The PIR detector has a field of view, often narrower than that of the camera lens. This is a crucial technical detail.
- A wide angle (110° for example) is ideal for monitoring a clearing or a trail junction.
- A long detection range (25m+) is necessary for large open spaces. But remember the section on IR lighting: it's useless for the detector to see an animal at 30m if your IR flash only properly illuminates up to 15m. The two must be consistent.
For a top-tier infrared night trail camera, look for models that offer granular PIR sensitivity adjustments and fast triggering. This is often what justifies the price difference between an entry-level model and a serious device. A good test? Place your camera trap in your garden and walk in front of it at your normal pace. If you consistently get a shot of your back walking away, the triggering is too slow.
Our Selection
For wildlife enthusiasts, hunters, or individuals looking to secure a garden, trail cameras have become an essential tool. On paper, the specifications of these devices all promise 4K images, night vision, and flawless detection. But in the field, performance varies. We analyzed three popular models, the CEYOMUR CY50, GardePro A50, and FunKind HC802A, based on their technical specifications and feedback from a large user community. Here is our selection to help you see more clearly.
| Product | Resolution (Photo / Video) | Night Vision (Type / Range) | Trigger Time | Strengths (According to reviews) |
|---|---|---|---|---|
| CEYOMUR CY50 | 48MP / 4K 30fps | IR 850nm (visible) / Not specified | 0.2s | Ease of use, Built-in screen, robust all-in-one design. |
| GardePro A50 | 64MP / "True" 4K | IR 940nm (invisible) / 27m | 0.1s | Ultra-fast trigger, 32GB SD card included, IP66 waterproof, discreet at night. |
| FunKind HC802A | 50MP / 4K | IR 850nm (visible) / 20m | 0.2s | Easy installation, multilingual (17 languages), good entry-level compromise. |
CEYOMUR CY50
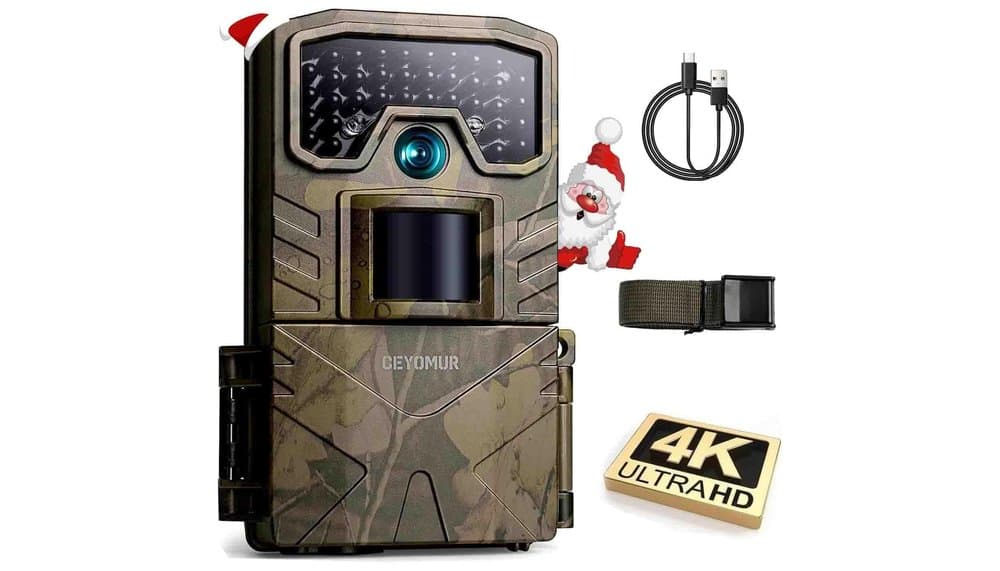
On paper, the CEYOMUR CY50 presents itself as a safe bet for beginners. Its specifications announce solid capabilities: 48MP photos, 4K video at 30fps, a built-in 2-inch LCD screen, and an IP66 waterproof construction. Its open design with everything (screen, lens) on the front is, according to user feedback, very practical for adjusting the viewing angle directly on site without disassembling the device. The community also notes its great ease of setup and easy mounting thanks to the included strap and mounts.
However, analysis of customer reviews reveals some concrete limitations that temper the enthusiasm. Firstly, the night vision uses 850nm infrared LEDs, which emit a faintly visible red glow detectable by animals (and humans). This can potentially alert wary wildlife, even though some users report the effect remains limited. Secondly, although fast (0.2s), its trigger speed is sometimes considered less performant than that of higher-end models under conditions of very rapid movement. Finally, it is crucial to note that, unlike some competitors, this camera does not include an SD card in its package, requiring an additional purchase.
In summary, the CY50 is a serious contender for a first trail camera, reliable and complete. It excels at basic garden or trail surveillance where total night-time discretion is not critical. For more intensive hunting use or capturing very fast and wary animals, one might look towards more reactive and discreet options.
GardePro A50

The GardePro A50 clearly positions itself as a high-end and high-performance model, and analysis of user feedback tends to confirm this ambition. Its specifications are impressive: a 64MP photo resolution, so-called "true" 4K video (without interpolation), an ultra-fast 0.1-second trigger speed, and night vision with 940nm "No Glow" LEDs, completely invisible. It even includes an industrial-grade 32GB SD card designed for 4K capture, a real plus noted by the community.
The strengths highlighted by users are numerous. The 0.1s trigger time, coupled with three PIR sensors, is frequently praised for its ability to capture fast-moving animals without missing them. Night-time discretion is another major asset: the total absence of red glow prevents frightening wildlife and increases stealth. Finally, the robustness and IP66 waterproofing are judged excellent for withstanding the elements long-term.
However, this performance has a downside. According to several reviews, the camera can be a bit more complex to configure than simpler models, due to its many options (programmable sensitivity, advanced trigger modes). Furthermore, its battery life, although decent, can decrease more quickly during intensive use of 4K video and numerous detections, a point to monitor based on feedback. We also note that its 2.4-inch color screen, although of good quality, is sometimes less readable in direct sunlight than monochrome screens.
The GardePro A50 is therefore aimed at a demanding and experienced user, whether a hunter, serious naturalist, or someone wanting high-level property security. It's the tool of choice for those who want to miss nothing and prioritize ultimate discretion and reactivity.
FunKind HC802A

The FunKind HC802A represents the most accessible option in this selection, offering a complete kit with a 32GB SD card included. Its specs line up respectable characteristics: 50MP photos, 4K video, three PIR sensors with a 25m detection range, and IP65 waterproofing. The community particularly appreciates its installation, judged as very simple, and its multilingual interface (17 languages) which makes it accessible to a wide audience.
However, analysis of customer reviews highlights significant compromises compared to the previous models. Just like the CY50, it uses night vision with 850nm LEDs which produce a visible red glow, reducing its night-time stealth. Its 0.2s trigger time is noted as sometimes limiting for very fast action scenes, potentially leading to truncated captures. The most criticized point concerns its IP65 waterproof rating, lower than the IP66 of the other two models. Several reviews report sensitivities to prolonged humidity or heavy rain, which can impact its durability in highly exposed environments.
Despite these limitations, the HC802A finds its audience. It is perfectly suited for occasional or seasonal use, such as observing animals in a garden or monitoring a corner of a property in generally mild weather conditions. It's an inexpensive entry point to discover the world of trail cameras without heavy investment, while benefiting from satisfactory 4K image quality for most uses.
Longevity: Weatherproofing, Battery Life, and Durability
This is the least glamorous aspect, but often the most decisive. You could have the best sensor in the world, but if it fails after a heavy downpour or its batteries die after three nights, you've failed. A good trail camera must be a soldier, capable of living outdoors in all conditions, for a long time, and without fuss.
Weatherproofing (IP Rating): Your Insurance Policy Against the Elements
Look at the IP rating; it's non-negotiable. It's composed of two digits: the first for resistance to dust, the second to water.
- IP65: This is the absolute minimum you should accept. It resists water jets from all directions. Perfect for installation under forest cover, sheltered from directly driving rain.
- IP66 or IP67: This is the next level up. IP66 resists powerful water jets, IP67 temporary immersion (up to 1m for 30 minutes). If you install your camera on the edge of a field, in the mountains, or in a very exposed area, aim for at least IP66. An IP68 rating promises prolonged immersion, but it's rarely necessary for our use.
Be wary of models that don't specify their IP rating or only mention a "weatherproof housing." This is often a sign of marketing vagueness. A simple but crucial tip: before the first deployment, check that the rubber gasket of the battery compartment and the SD card slot is properly in place and clean.
Battery Life: Between Battery Chemistry and Software Intelligence
You often read "up to 6 months of battery life." In reality, this is an estimate under ideal conditions: low sensitivity, few triggers, mild temperatures. In winter, with a very active animal, divide that number by three, sometimes by four.
The type of battery is crucial:
| Battery Type | Advantages | Disadvantages | Best For? |
|---|---|---|---|
| Standard Alkaline Batteries | Easy to find, low price. | Performance drops in cold weather, poor battery life. | Emergency use or very short-term testing. |
| Lithium Batteries (AA) | Excellent performance in cold (down to -20°C), significantly longer battery life. | Higher purchase cost. | The recommended choice for any serious deployment, especially in cold seasons. |
| Integrated Rechargeable Battery | Economical in the long run, often paired with a solar panel. | Camera is immobilized during recharging. | Semi-permanent installation with good sunlight. |
The best nocturnal infrared trail camera also optimizes its consumption through its software. For example, some intelligent models switch to a deep sleep mode between detections or adapt the IR flash power based on the subject's distance. These small details make a huge difference in how often you have to visit to change the batteries.
Physical Durability: Facing Animals and... Humans
Your camera will be fixed to a tree. It will endure vibrations, shocks, and perhaps pecks or kicks. A housing made of plastic that is too thin will crack at the first frost. Look for models with a clean design, without too many protrusions that could break, and with sturdy mounting hardware. A lens glass protected by an integrated grid is a real plus against curious creatures (wild boars, squirrels...). And let's be frank, in some areas, the risk of theft or vandalism exists. A cable lock with a sturdy padlock is a wise precaution. Sometimes, discretion (camouflage color, sober housing) is better than a high-tech look that attracts envy.
Choosing Based on Your Observation Terrain and Usage

This is the heart of the matter. The best nocturnal infrared camera trap does not exist in an absolute sense; it is the one that matches your terrain, your target, and your visitation frequency. What works for a roe deer in an agricultural plain will be a disaster for small mammals in dense undergrowth.
Observing Large Wildlife in Open Areas (Open Forest, Edge, Meadow)
Here, range is your ally. You are targeting medium to large animals (foxes, wild boar, roe deer) that may cross the field of view several meters away.
- Priority 1: A Long-Range IR Flash. Aim for a certified nocturnal range of at least 20 meters. Below that, you risk having underexposed silhouettes if the animal passes at a distance. Some models even offer two flash intensities (low/high) to adjust based on the expected distance.
- Priority 2: A Wide Detection Angle (120° or more). This compensates for distance and increases your chances of capture in an open environment.
- In Practice: In a clearing, set up the trap facing north to avoid overexposure at sunrise/sunset. Target an obvious passage point (vegetation corridor, edge of a water point). The ideal height for the tripod or mount is about 1 meter.
Tracking Small Animals in Dense Environments (Undergrowth, Hedges)
This is a completely different game. Distances are short, vegetation is everywhere, and subjects are fast and small (martens, hedgehogs, ground birds).
- Priority 1: Ultra-Fast Trigger Speed (< 0.3 s). This is crucial. A dormouse darts and disappears in a second. If your trap takes half a second to react, you'll only get its tail in the photo.
- Priority 2: A "Reduced Target Detection" Mode. This function allows you to restrict the PIR detection zone to the center of the image, avoiding thousands of false triggers caused by a branch moving in the wind at the edge of the frame. It's a huge gain in autonomy.
- In Practice: Place the trap very low, between 30 and 50 cm from the ground. Point it towards a stump, a small path, or the entrance to a burrow. Prefer a "no-glow" (invisible) IR flash to avoid alerting the most wary animals at such close range.
Managing a Water Point or Bait Station
This is the "hot spot" scenario. You know animals come regularly to a specific spot. The challenge is no longer detection, but managing volume.
- Priority 1: High Storage Capacity and a Time-Lapse Option. A 128 GB SD card is almost essential. Activate time-lapse mode in addition to detection mode: it will take a photo every X minutes (e.g., every 10 minutes during the day), providing you with an overview of activity at the spot, even in the absence of movement.
- Priority 2: A Video Function with Pre-Recording Trigger. This gem of technology starts recording a few seconds before the PIR sensor triggers, using a buffer memory. You thus capture the animal's arrival, not its departure. Invaluable for understanding behaviors.
- In Practice: For a water point, securely attach the trap to a tree about 2-3 meters from the bank, at a slight downward angle. This widens the field of view and minimizes the risk of splashes on the lens.
The Special Case of Isolated or Hard-to-Access Installations
You're leaving for a month at a mountain refuge or monitoring a remote plot. Reliability and remote monitoring become central.
- Cellular Connectivity (GSM/4G) Changes Everything. It allows you to receive photos directly on your smartphone without having to travel. It's an additional cost (SIM card, data plan) but a huge time saver. Check the network coverage at your site before choosing this option.
- Solar Power Becomes Obvious. Combined with a large internal battery, it guarantees autonomy for several months, even in winter with low sunlight. It ensures you never miss an entire season of observation.
- My Opinion: For very occasional and easy-to-access use, these features are superfluous. But if your serious project is to monitor an area without setting foot there every week, they are not a luxury: they are the condition for the success of your study.
Mastering Advanced Settings and Installation
This is where amateurs separate from experts. Having good equipment is one thing. Making it work for you is another. These settings transform a gadget into a reliable scientific tool. Don't settle for automatic mode; it often wastes opportunities.
The Winning Strategy: Multi-Mode
A better infrared wildlife camera often offers you three modes: Photo, Video, and Photo + Video. The temptation is strong to choose Photo + Video to "miss nothing." A serious mistake. This drains batteries and fills the SD card with useless duplicates.
- For presence monitoring (which animal passes by?), Photo mode with 2 or 3 images per detection is perfect. You save memory and energy.
- For studying behavior (how does it eat? what is it doing?), Video mode of 10 to 30 seconds is essential. Set it with sound enabled; it's a goldmine of information.
- Use "Photo + Video" only for very specific and rare events, like the visit of a flagship species at a location, where you absolutely want both media.
The Art of Taming the PIR Sensor
Sensitivity and the interval between shots are your secret levers.
- Sensitivity: In dense forest with a lot of moving vegetation, set it to "Low" or "Medium." Otherwise, the wind will trigger hundreds of empty photos. In open areas in winter, with little extraneous movement, dare to set it to "High." You will capture animals from farther away.
- Interval: This setting defines the trap's inactive time after a detection. An interval that's too short (5 seconds) creates endless series of the same animal pacing. An interval that's too long (5 minutes) may cause you to miss the arrival of a second subject. For most uses, an interval of 30 seconds to 1 minute is an excellent compromise. The animal has time to leave the field, and the trap is ready for the next one.
Field Installation: More Than Just Common Sense
Theory is good. Practice is better.
- Test before you leave. Check the settings, focus, and LED position in your garden. A branch at 2 meters is a good test. This avoids discovering a flaw after a week on site.
- Secure Mounting > Perfect Height. A strap that's too loose and causes the device to tilt towards the ground after three days is a guaranteed disaster. Tighten it until the tree trunk almost gives. Use an adjustable mount if your model has one, to adjust the framing without loosening the strap.
- The "Right Angle." Never aim at a pronounced upward or downward slope. The PIR sensor is ineffective on these planes. Look for terrain that is as flat as possible facing the device. Also avoid pointing directly towards the rising or setting sun: the low sun in the lens can blind the sensor for part of the day.
- The SD Card and Batteries. Don't buy the cheapest SD card. Data corruption after 3 months of capture is heartbreaking. Get a reliable brand, Class 10 or UHS-I. For batteries, frankly, forget standard alkaline batteries. Lithium (Li-Ion) batteries last longer and, most importantly, withstand freezing temperatures without losing their charge. It's an investment that pays off.
Conclusion
Choosing a nocturnal infrared trail camera is not rocket science. It's a matter of priority.
First focus on night image quality and reaction speed. Then, ensure the housing's durability and solid battery life. Finally, master its settings in the field.
The right model is the one that matches your terrain and your patience. Go for it, set it up, and let nature fill your memory card.
Frequently Asked Questions
How to choose a good trail camera for night use?
The quality of a night image primarily depends on the range and type of infrared flash (prefer 'no-glow' LEDs), a fast trigger speed (<0.5s), and a waterproof housing (IP66 rating minimum).
What waterproof rating is necessary for an outdoor trail camera?
An IP66 rating is recommended for resistance to powerful water jets and installation in all conditions; it is the absolute minimum to accept so it can withstand forest weather.
What is the best battery life for a trail camera?
Battery life depends on the batteries: use lithium (AA) batteries for excellent cold-weather performance and long life, rather than alkaline batteries whose performance drops quickly in winter conditions.
What trigger speed is needed to photograph fast animals?
To not miss lively animals like birds or small mammals, a trigger speed of less than 0.3 seconds is essential.
How to avoid blurry or empty photos at night with a trail camera?
To avoid false triggers on vegetation, set the PIR detector sensitivity to "Low" or "Medium" in a windy environment and use a good quality IR flash for uniform lighting.
Should photos or videos be prioritized with a trail camera?
Primarily use Photo mode for presence monitoring (saving memory and energy) and reserve Video mode for the detailed study of animal behaviors.
100% free and independent — All our articles are written independently, without any sponsorship. We may earn a commission on purchases made through our links, at no extra cost to you.
Guides you might like

Astrophotography Telescope Buying Guide
Choose the right telescope for astrophotography to avoid frustration. Key factors depend on your target nebula or object.

Best Binoculars Value Guide
Find value binoculars that match your real needs. Understand specs like 8x42 and key features for the best observation without overspending.

Best Nature Binoculars Kids
Discover how to choose the perfect first binoculars for a child, focusing on lightweight design, ergonomics, and sparking a love for nature observation.
Articles you might like

Bresser Junior 6x21 Binoculars Review
Discover the ideal first binoculars for kids. Bresser Junior 6x21 offers robust, simple optics to spark a lifelong love for nature exploration.

Adjustable Latitude Equatorial Wedge Review for Telescopes
Precision equatorial wedge for telescopes & astrophotography. Converts photo tripods into stable tracking platforms for celestial photography.

K&F CONCEPT Tripod & Extension Arm Review
Review of K&F CONCEPT tripod with extension arm for versatile smartphone & camera photography and video creation. Our hands-on analysis.