Buyer's Guide: Choosing the Right Spotting Scope Tripod
Guide
You have invested in a high-performance spotting scope, but at the first gust of wind, the image shakes like a leaf? The problem likely doesn't come from the optics, but from its support. Choosing the right tripod is not a detail, it's the other half of your equipment. A poor choice ruins everything, while the right model transforms your observation into a stable, precise, and truly enjoyable experience. And frankly, making the right choice is simpler than it seems.
Key Points to Remember
- A fluid head is essential for smooth tracking of moving subjects, unlike traditional photo heads.
- Choose a tripod whose payload is at least double the weight of your equipment for guaranteed stability.
- Prioritize maximum height without the center column extended and avoid extending the thin final sections for more rigidity.
- First invest in stable legs (60-70% of the budget) before choosing a quality head.
- For hiking, carbon fiber is ideal for its lightness and damping, while aluminum is better suited for fixed use.
What Differentiates a Spotting Scope Tripod from a Standard Photo Tripod
It's the number one mistake, and I made it too at the beginning: thinking a photo tripod will do. The reality in the field is quite different. The purpose is not the same. In photography, you seek momentary stability, for the time it takes to focus and trigger. In observation with a spotting scope, you need permanent stability and smooth tracking, sometimes for entire minutes, to follow the flight of a bird of prey or the stealthy movement of an animal.
The Philosophy of the Tripod Head: Control versus Fluidity
This is the heart of the matter. A classic photo head (ball or 3-way) is designed to lock solidly into a position. It has some play? That's not so bad for a photo. For your eye pressed against a high-magnification eyepiece, that same play becomes a nightmare: the slightest vibration is amplified, the image wobbles. The ideal head for a spotting scope, often called a fluid or friction head, works on a different principle. It offers adjustable and uniform resistance. You can follow a moving subject with a slow and continuous motion, without jerks. It's the difference between a jerky and frustrating observation and natural, almost intuitive tracking. For me, it's the non-negotiable element.
Payload: Aim High for Peace of Mind
Photo tripod manufacturers indicate a maximum load. For a spotting scope, this data is misleading. Let's take a concrete example: your instrument weighs 2 kg. A tripod stating a max load of 4 kg seems sufficient, right? In practice, it's too close. You must consider the weight of the head, any accessories (a smartphone adapter for digiscoping), and above all, the margin needed to counteract the lever effect created by the mounted spotting scope. A lateral wind exerts a force much greater than the simple weight. My absolute rule? Choose a tripod whose payload is at least double the weight of your complete equipment. That's the secret of a good spotting scope tripod: a reserve of stability that makes all the difference in real conditions.
Dynamic Stability vs Static Stability
In photography, you deploy the tripod, set it down, and that's it. In observation, you constantly interact with it: you turn the focus wheel, you manipulate the head. A tripod that is too lightweight will transmit all these micro-movements to the image. The quality of materials and joints plays a key role here. Carbon fiber is not just about weight; it dampens parasitic vibrations better than aluminum. Similarly, a center column, often useful in photography, becomes a weak point in high-magnification observation: it introduces a source of vibration. The most stable models for spotting scopes don't have one, or it is retractable to be used only as a last resort.
Frankly, using a photo tripod for a spotting scope is a bit like putting city car tires on a 4x4 to go into the forest. It might run for a while, on flat ground, but as soon as the terrain gets tough, you are limited and frustration rises. Investing in a support designed for the job radically changes your experience.
The Foundations of Stability: Materials, Design, and Payload

Now that we understand the philosophy, let's talk technique. Stability is not a vague word; it is the sum of concrete details. If your tripod shakes, you miss details and your observation session becomes a battle against the gear rather than an immersion in nature. Let's break down the pillars of this stability.
Material Choice: Aluminum or Carbon Fiber?
This is the first major question, and it often boils down to a compromise of budget/weight/performance.
Aluminum is the classic choice. It is robust, very rigid, and generally less expensive. Its main flaw? Weight. A serious aluminum tripod can easily weigh 2.5 to 3 kg. That's weight to carry on a hike, but it's also mass that contributes to stability once set up. However, aluminum transmits vibrations more easily (a knock on a leg, wind making the tubes vibrate). For stationary use from an observatory or a hide, or if your budget is tight, it's an excellent choice.
Carbon fiber is the champion of the stiffness-to-weight ratio. For an equivalent size and strength, a carbon fiber model will often weigh 25 to 40% less than its aluminum counterpart. But its real advantage for us is its ability to dampen vibrations. Micro-tremors dissipate faster in the composite material. This is a decisive advantage at high magnification. The downside, you guessed it, is the price, often double for comparable models. For a mobile observer who walks a lot with their equipment, the investment is fully justified.
Leg Design: Sections, Diameters, and Locks
Look closely at the structure. A tripod with 4 leg sections will be more compact than a 3-section model, but less stable because the last segment is very thin. For spotting scope use, I strongly prefer models with a maximum of 3 sections. The rigidity is much better.
The tube diameter, especially that of the first section, is a key indicator. The wider it is, the more rigid the tripod. To support a heavy spotting scope, aim for a first section diameter greater than 28 mm. Less than that, and you risk vibrations at full extension.
The locking systems are also crucial. Clamp-style locks (Manfrotto type) are known for their solidity and their ability to hold tubes securely, even after years. Twist locks can wear out the bushings and are slower to operate. Flip locks ("lever locks") are fast and practical with gloves, but check their build quality: they must have no play.
Payload Capacity: The Safety Margin That Is Too Often Underestimated
Let's revisit an example I see too often. Your spotting scope weighs 1.8 kg, your head 0.5 kg. Total: 2.3 kg. You find a nice tripod with a max payload of 3 kg. That works, right? In theory, yes. In reality, it's risking chronic instability.
Why? Because that maximum load is often given under ideal laboratory conditions, without wind, without the weight of an additional accessory like a digiscoping adapter. Above all, it does not account for the leverage factor. Your equipment is not placed at the center; it is perched up high. A gust of wind, a hand touching the eyepiece to focus, and you generate a force couple that stresses the tripod well beyond the simple weight. My advice, without hesitation: take a comfortable margin. For equipment weighing 2.5 kg, aim for a tripod with a payload capacity of at least 5 kg, ideally 6 or 7 kg. This margin is your peace-of-mind insurance in the field, and it's what often defines the best spotting scope tripod for your practice.
Our Selection
Are you looking for a spotting scope for observing nature, sport shooting, or simply to capture distant details? In this selection, we analyze two flagship models from the SVBONY brand and a tabletop tripod that could well complete your equipment. We have examined the technical specifications and community feedback to give you a clear view of what these products offer, from their strengths to the limitations reported by users.
| Product | Magnification | Objective Diameter | Waterproofing & Prism | Included Equipment |
|---|---|---|---|---|
| SV28 Long View Monocular | 25-75x | 70 mm | IP65 & BaK-4 Prism | Tabletop tripod, smartphone adapter, case |
| SV28PLUS Spotting Scope | 25-75x | 70 mm | IP65 & BaK-4 Prism | Tabletop tripod, smartphone adapter |
| RTI Tabletop Tripod | N/A | N/A | N/A | 2 fine-adjustment knobs |
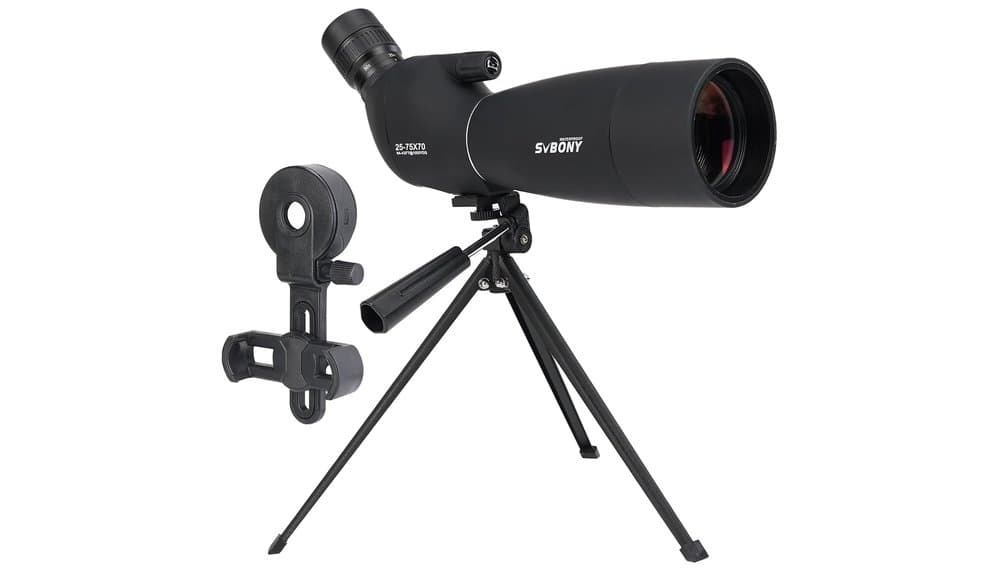
SV28 Long View Monocular

On paper, the SV28 presents itself as a versatile and well-equipped monocular spotting scope, perfect for beginners. Its variable magnification from 25x to 75x, coupled with a 70mm objective, promises good light-gathering capacity, even in modest lighting conditions. The BaK-4 prism and multi-layer optical coatings are hallmarks of quality often associated with a sharp and contrasted image.
According to user feedback, its main advantage lies in its excellent value for money. It is regularly cited as a very decent entry point into the world of high-magnification observation. The inclusion of a universal smartphone adapter and a small tabletop tripod is highly appreciated, making it easy to share discoveries or immortalize a scene.
However, the community notes significant limitations. Firstly, stability becomes critical beyond 50x magnification. Without a robust tripod (the included one being considered too light for outdoor use in the wind), the image shakes considerably. Secondly, reviews highlight that sharpness drops noticeably at the highest magnifications (70x-75x), where the image can become somewhat "soft" and less contrasted. Finally, although advertised as IP65 waterproof, some users recommend remaining cautious and not exposing it to very heavy rain, as the eyepiece seal can be a weak point.
In summary, the SV28 is a complete and economical solution for those wanting to discover terrestrial observation without breaking the bank, provided they invest in a sturdier tripod to fully exploit its potential and accept some compromises at the very highest magnifications.
SV28PLUS Spotting Scope
The SV28PLUS appears as the direct evolution of the SV28, sharing its main characteristics (25-75x, 70mm objective, IP65) but with notable optical improvements. The specification highlights its "A5 Claret Red" coating (burgundy red), a treated layer meant to enhance light transmission and contrast, particularly in low light.
Community feedback confirms that, in the field, these improvements are noticeable. Users report an image slightly brighter and with more faithful colors than that of the standard SV28. The 23mm eyepiece also offers a slightly wider field of view at minimum magnification, making it easier to locate subjects. Like its little brother, it is considered very easy to get started with and benefits from the same practical kit with smartphone adapter and tabletop tripod.
The identified limitations are essentially the same as for the SV28, but often mitigated. The need for a robust tripod at high magnifications remains, although overall stability seems better. The drop in image quality beyond 60x is still present, but less pronounced according to several reviews. It is also noted that its size and weight (770g) are slightly greater, which can be a point to consider for long hikes.
The SV28PLUS therefore positions itself as a smart intermediate choice for those willing to invest a little more for superior optical quality and perhaps more refined finishes, while remaining in an accessible price range.
Folding table tripod

The RTI Tabletop Tripod is not a spotting scope, but an accessory that can change the user experience of the two previous products. Its technical specifications are simple: a feather-light weight of 410g, an adjustable height from 28 to 37.5 cm, and a standard 1/4-inch screw make it compatible with almost all spotting scopes, cameras, and small observation equipment.
The community particularly recommends it for use on a table indoors, or placed on a stable low wall outdoors. Its compact size when folded (34 cm) makes it a discreet travel companion. The key strength emerging from reviews is the presence of two fine-adjustment knobs, allowing micro-adjustments laterally and vertically for perfectly centered and stable framing, much more precise than with a basic tripod.
However, one should not be mistaken about its purpose. Users describe it as a precision accessory, not for brute stability. It is perfect for stationary and comfortable observation from a fixed point, but offers no resistance to wind and is not designed for use at human height on unstable ground. Its relatively small mounting plate can also be a drawback with very heavy equipment.
In short, this RTI tripod is the ideal accessory for those wishing to stabilize their spotting scope on a flat surface (patio table, hide, car) and benefit from precision adjustment for framing, advantageously complementing the basic tripod included with the SVBONY products.
Selecting the Right Type of Tripod Head for Your Observations
A stable tripod is good. A stable tripod with the wrong head is like a sports car with tractor tires: you have all the foundation, but the experience is terrible. For a spotting scope, the head is not an accessory; it is the direct control interface with your subject. Your choice will radically change your way of observing.
The Fluid Head (or Friction Head): The Queen of Tracking
Imagine. You are tracking an osprey soaring above a pond. With a traditional photo ball head with a ratchet, every movement is jerky: you lose the subject, you catch up, it's frustrating. The fluid head works on a principle of adjustable friction. You tighten or loosen a knob to control the resistance of horizontal movement (panning) and vertical movement (tilting). The result? Perfectly smooth and continuous tracking.
This is the essential choice for everything that moves: birdwatching, mammal observation, sports. You can adjust the tension so a light touch of the finger allows you to follow a bird in flight, or conversely stiffen it for fixed observation at high magnification. My opinion is categorical: if you mainly observe moving subjects, it is the only serious option. Check the quality of the glide: it must be uniform, without jerks or stiff spots.
The 2-Axis Head (or Video Head): Pure Stability
This head often looks like a large handle topped with a platform. Its advantage? It perfectly separates movements. One lever controls horizontal panning, another controls vertical tilt. It is designed for extremely precise and controlled movements, often with a graduated scale.
This is the tool of choice for serious digiscoping, or for astronomical observations where you want to make very precise micro-adjustments. It is also often heavier and bulkier. For purely visual use, I sometimes find it less intuitive and slower than a good fluid head. But if your practice closely mixes photo/video and visual observation, it is a powerful compromise.
The Gimbal Head: For Very Long Focal Lengths and Heavy Digiscoping
We are leaving the realm of standard hobbyist equipment to enter specialized high-end territory. A gimbal head supports the instrument by its center of gravity, leaving it perfectly balanced. Once balanced, it allows you to move a heavy scope with your fingertips, and it stays in position when you let go.
This is the ultimate solution for amateur astronomers with large instruments, or for wildlife photographers equipped with huge telephoto lenses. For a standard hiking spotting scope, it is clearly overkill. But if you are mounting a heavy system (an 80mm scope and a DSLR for digiscoping), it can become relevant. The price and weight are significant barriers to entry.
The Plate and Quick-Release System: The Detail That Changes Everything
It's an afterthought, yet it's essential. Most heads use a quick-release plate system. For a spotting scope, make sure the provided plate is long enough and has a lip (a small tab) to prevent your instrument from rotating on its own. A plate that is too short is a guarantee of an unexpected tip-over.
Some high-end models directly integrate a specific interface for spotting scopes, a kind of V-shaped cradle that fits the shape of the body. It offers impeccable stability and avoids any unwanted movement. When you are looking for the best spotting scope tripod for you, never neglect this point. A poorly adapted mount can ruin the benefits of an otherwise excellent head.
The Ideal Compromise Between Portability, Height, and Stability

This is the great puzzle. An ultra-stable tripod is often heavy and inconvenient to transport. A lightweight and compact model risks trembling at the slightest breeze. This is where real selection comes into play, far removed from technical datasheets. There is no perfect tripod, only the one that best suits your way of going out into the field.
The Trap of the Advertised Height
Always look at two numbers: the maximum height and the maximum height without the center column extended. A tripod may proudly advertise a height of 170 cm, but if you have to extend the center column by 30 cm to reach it, you lose a great deal of stability. This column becomes a lever that amplifies vibrations. My rule: aim for a maximum height (without the column) that allows you to observe standing up, with your neck straight, without bending over. For most people, 150-155 cm is a good target. For a child or if you often observe while seated, you can go down to 140 cm. The trick? Test it with your own posture.
Weight to Carry vs. Weight to Stabilize
Here's a good way to think about it. The weight in your backpack (carried weight) should be as low as possible, especially if you hike. The weight once deployed (stabilizing weight) should, however, be sufficient to ensure a solid base. This is where materials play their role. A carbon fiber tripod often weighs 30 to 40% less than an equivalent aluminum model, for similar or superior rigidity. The difference on a day of walking is huge. But frankly, if your practice involves taking the car out and setting up the tripod 50 meters away, aluminum is an excellent economical choice.
Also look at the folding system. Some so-called "reverse-folding" models fold the legs backwards around the head. This allows for a noticeable space saving in the bag (folded lengths around 40 cm are possible), but setup can be a bit longer.
Leg Sections: A Balancing Act
A tripod usually has 3 or 4 sections per leg. The more sections there are, the more compact the tripod is when folded… but the less rigid it is. The thinnest section (the last one deployed) is the weak point. For classic use, three sections offer an excellent compromise. Four sections are justified if compactness is your absolute criterion, for example for air travel or lightweight alpine hiking. Practical tip: whenever you can, do not deploy that last thin section. Your stability will be greatly improved.
Your Typical Scenario as the Ultimate Guide
Let's imagine a few concrete profiles:
- The Hiking Birdwatcher: He walks 10 km with his gear on his back. For him, carbon fiber is a real plus. A columnless height of about 145-150 cm is sufficient, and 4 sections may be acceptable to gain in folded length. Target weight? Less than 2 kg with the head.
- The Fixed-Point Observer (in a hide, from an observatory): The absolute priority is stability, period. Weight matters little, height must be comfortable for long sessions. A sturdy 3-section aluminum model with good height is ideal. This is often where you find the best spotting scope tripod for pure stability.
- The Versatile Naturalist: He alternates light walks and more static outings. He needs a stable "Swiss Army knife." A 3-section carbon tripod with generous columnless height is the safest investment. It’s the compromise that proves least frustrating in the long run.
Never forget: the best tripod is the one you want to take with you. A model that is too heavy or too bulky will stay at home, and all its theoretical stability will be useless to you. Weigh your own tolerance before letting yourself be seduced by technical promises.
Budget and Ranges: Where to Invest Wisely
There's a truth we often forget: the budget isn't discussed in euros, but in avoided frustration. A cheap tripod can become a real nuisance, ruining every outing. Conversely, spending a fortune on features you don't need makes no sense. Let's see what you really get at each level.
Under 100€: The Caution Zone
At this price, you mainly find versatile, lightweight aluminum photo tripods. They do the job for a compact spotting scope, in calm weather, and for short sessions. But be honest with yourself: stability is average, the heads often have play, and the locking mechanisms are not made for micro-adjustments. It's an entry point, but if your practice becomes serious, you'll quickly regret it. A piece of advice: if your budget is tight, it's better to look for a used model from a higher range.
From 150€ to 350€: The Kingdom of Best Value for Money
This is where it gets interesting for the majority of observers. You gain access to:
- Dedicated observation tripods, designed for vertical stability first and foremost.
- Good quality fluid (friction) heads, allowing smooth tracking of birds.
- The choice of material: robust aluminum (around 150-220€) or carbon fiber (from 250-300€) for a noticeable weight gain.
- Serious payload capacity, often between 8 and 12 kg, allowing you to support a spotting scope and a digiscoping adapter without stress.
If you were to remember just one budget, it would be this one. This is where you pay for features that make a real difference in the field, without crossing into semi-pro gear.
Above 400€: The Investment for Demanding Users
We enter the realm of professional tripods. This money buys:
- Exceptional rigidity, even with the last sections extended.
- High-end materials: tightly woven carbon fiber, light alloys, ultra-precise and durable locking systems.
- Fluid heads with incomparably smooth and progressive movement, without jerks.
- A finish that withstands years of intensive use and extreme conditions.
For whom? For those who use a heavy spotting scope (over 2 kg), for the demanding digiscoper who tolerates zero vibration, or for the observer who spends hours in a hide in windy areas. This is where we can talk about the best spotting scope tripod for intensive use.
Where to Prioritize Spending?
Do not split your budget evenly between the tripod and the head. The base (the legs) is fundamental. A superb head on unstable legs will always be unstable. The reverse is less true. My rule: allocate about 60 to 70% of your budget to the legs, and the rest to the head. It's always possible to upgrade the head later, whereas changing an undersized tripod is a complete replacement.
And a final personal opinion: be wary of attractive all-in-one packages. They are often unbalanced, with decent legs but a low-end head, or vice versa. Prefer buying components separately, it gives you total control over your quality-price balance.
Practical Tips for Using and Preserving It in the Field

Having the best spotting scope tripod is useless if you don't know how to use it. The difference between a sharp image and a shaky blur often comes down to those small, neglected gestures. It's a bit like a musical instrument: you need to know how to adjust and maintain it to reveal its full potential.
Adjusting in the Field: Gain Stability Immediately
Make this a reflex: never deploy the last sections of the legs unless it's absolutely necessary. These thin little tubes are the primary sources of flex and vibration. For standard height, open the large segments first. You'll gain rigidity instantly.
The hook under the center column is not there by accident. In high winds, hang your backpack or a weight bag from it. This extra weight, placed at the center of gravity, literally anchors the tripod to the ground. It's the simplest and most effective trick for stabilizing a lightweight tripod. Some observers use a small pouch filled with sand that they keep in their bag.
Finally, position yourself correctly. Don't stretch to reach the eyepiece. If you have to bend over, the height is poorly adjusted. Adjust the tripod so your posture is natural and relaxed. A comfortable observation is a longer and more precise observation.
Transport and Storage: Avoid Premature Wear
A common mistake? Storing your tripod always closed and tight, leaving the head and legs under tension in the backpack. Over time, this strains the joints and mechanisms. Ideally, there is a bag suited to its size when slightly deployed. If not, at least try not to jam it at the bottom of an already overstuffed bag.
In the field, when moving it over short distances, don't carry it over your shoulder like a rifle. Instead, hold it by the center column with the legs grouped together, to prevent it from knocking into things and getting caught in vegetation. This also protects the settings on your head.
Cleaning and Maintenance After an Outing
Mud, sand, and seawater are the worst enemies of the mechanisms. After a wet or dusty outing, take five minutes for basic maintenance:
- Fully deploy the tripod.
- Wipe down the tubes with a soft, slightly damp cloth to remove dirt.
- Check the joints and locking knobs: ensure no grain of sand is blocking a lever or knob.
- For friction-based heads, a gentle dusting with a brush is usually sufficient. Never use aggressive products or lubricating oils without knowing the manufacturer's recommendation—you risk attracting even more dust or altering the controlled friction.
One last often-forgotten point: the gaps between the leg sections. These small spaces where dirt accumulates can, over time, prevent full locking. An occasional dry brush cleaning works wonders.
Frankly, these actions are simple, but they preserve your investment in the long term and ensure your equipment is always ready and reliable, no matter the weather. This is what separates the casual observer from the true enthusiast who relies on their gear.
Conclusion
Choosing the right tripod for your spotting scope is not just an accessory; it's a performance multiplier.
A good choice stabilizes your view. It extends your sessions. It transforms frustration into pure pleasure.
Take the time to think about it. Your eye will thank you.
Frequently Asked Questions
Which head to choose for a spotting scope?
For a spotting scope, the ideal head is a fluid or friction head, as it offers adjustable resistance for smooth and continuous tracking of moving subjects, unlike photo heads designed for point-and-lock use.
Which tripod for a 2 kg spotting scope?
For a 2 kg spotting scope, choose a tripod with a maximum load capacity of at least 5 kg, and ideally 6 or 7 kg, to have a sufficient safety margin against wind and the lever effect.
Carbon fiber or aluminum for a spotting scope tripod?
Carbon fiber is lighter and dampens vibrations better, ideal for hiking, while aluminum is more rigid and economical, perfect for stationary use where weight is less important.
How to properly stabilize a spotting scope tripod?
To properly stabilize a tripod, do not extend the thinnest, last leg sections unless necessary, and hang a weight (like your bag) from the center column hook to anchor it to the ground.
What is the ideal height for a spotting scope tripod?
The ideal height for a spotting scope tripod is one that, without raising the center column, allows you to observe while standing with your neck straight, which is typically between 150 and 155 cm for a person of average height.
What budget for a good spotting scope tripod?
For a good quality-price ratio, a budget of €150 to €350 gives access to tripods dedicated to observation, offering serious stability and the choice between aluminum and carbon fiber.
100% free and independent — All our articles are written independently, without any sponsorship. We may earn a commission on purchases made through our links, at no extra cost to you.
Guides you might like

Astrophotography Telescope Buying Guide
Choose the right telescope for astrophotography to avoid frustration. Key factors depend on your target nebula or object.

Best Binoculars Value Guide
Find value binoculars that match your real needs. Understand specs like 8x42 and key features for the best observation without overspending.

Best Nature Binoculars Kids
Discover how to choose the perfect first binoculars for a child, focusing on lightweight design, ergonomics, and sparking a love for nature observation.
Articles you might like

Bresser Junior 6x21 Binoculars Review
Discover the ideal first binoculars for kids. Bresser Junior 6x21 offers robust, simple optics to spark a lifelong love for nature exploration.

Adjustable Latitude Equatorial Wedge Review for Telescopes
Precision equatorial wedge for telescopes & astrophotography. Converts photo tripods into stable tracking platforms for celestial photography.

K&F CONCEPT Tripod & Extension Arm Review
Review of K&F CONCEPT tripod with extension arm for versatile smartphone & camera photography and video creation. Our hands-on analysis.