Choosing Astronomy Binoculars
Guide
How to Choose the Perfect Binoculars for Astronomy
You dream of piercing the depths of the starry sky and discovering the details of the Moon? Choosing binoculars is your first and most crucial decision. Far from obscure technical catalogs, it's mainly about finding the perfect balance between power and comfort, because an unsuitable instrument too often ends up at the back of a cupboard. Let's explore together how to make the right choice, without breaking the bank or complicating your life.
Key Points to Remember
- A magnification of 7x to 10x is ideal for stable hand-held observation, while an objective lens of at least 50 mm in diameter is crucial for capturing enough light.
- The exit pupil (objective lens diameter / magnification) should ideally be between 5 and 7 mm to match your eye's pupil in the dark and optimize brightness.
- Prioritize binoculars with BaK-4 glass prisms and Fully Multi-Coated coatings for a brighter, more contrasted image with no light loss.
- For prolonged use or high magnification (beyond 12x), using a solid tripod is essential to stabilize the image and observe comfortably.
- 10x50 models represent the best versatile compromise for beginners, combining power, brightness, and ease of use without a tripod.
Deciphering the Numbers and Understanding the Basics
You've seen them on every pair: those two mysterious numbers, like "10x50" or "7x42". This is the code to know above all. And frankly, for astronomy, these two numbers tell almost the whole story. Let's decipher them.
Magnification vs. Objective Lens Diameter
The first number is the magnification. A "10x" means you see objects ten times closer than with the naked eye. It's tempting, but be careful! High magnification (let's say, beyond 12x) without a tripod gives an unstable image that shakes with your slightest heartbeat. For handheld observation, stay between 7x and 10x, that's the sweet spot.
The second number is the diameter of the objective lenses in millimeters. This is where everything happens for your stargazing sessions. 50 mm objectives capture much, much more light than 25 mm ones. Imagine comparing a bucket and a glass under a rainstorm of stars: which one fills up faster? To see faint nebulae and the texture of the Milky Way, aim for at least 50 mm.
The Exit Pupil, Your Key to the Night
Here is the secret calculation many ignore. The exit pupil is the diameter of the beam of light that exits the eyepiece and enters your eye. You get it simply: objective lens diameter divided by magnification. With a 7x50, you have an exit pupil of 7.1 mm (50/7).
Why is this crucial? Because your eye's pupil, in total darkness, dilates to a maximum of about 5 to 7 mm (a bit less with age). If your binoculars' exit pupil is smaller, you are wasting light. If it is larger, you are not using all of it. For the best astronomy binoculars, aiming for an exit pupil between 5 and 7 mm is ideal. A 10x50 (5 mm pupil) works very well. A 7x50 (7.1 mm) is fantastic for very dark skies. A 15x70 (4.7 mm) will be a bit less luminous in theory, but its large size will compensate.
| Typical Format | Exit Pupil | Strengths for Astronomy |
|---|---|---|
| 7x50 | 7.1 mm | Wide field, very bright, stable handheld. Perfect for exploring the Milky Way. |
| 10x50 | 5 mm | Finer details on the Moon, good brightness/power balance. The most versatile. |
| 15x70 | 4.7 mm | Powerful, light-gathering. Mounted on a tripod, reveals galaxies and nebulae. |
The Field of View: Wide as the Sky
The field of view, often indicated in meters at 1000 m or in degrees, is the expanse of the celestial landscape you see without moving the binoculars. A wide field (more than 6° or 110m/1000m) is pure joy for navigating among stars and admiring vast objects like the Orion Nebula or the Pleiades cluster. High magnification inevitably reduces it. The choice is yours: a spectacular overview or a precise zoom on a small area. Personally, for pure pleasure, a wide field often wins.
Evaluating the Quality of Optical Components
Numbers are one thing. But what happens inside the binoculars is what makes the difference between a dull, blurry image and a clear, sharp "wow" when you point the instrument at Jupiter. Optical quality is the critical factor for astronomical observation. You cannot cheat the physics of light.
The Heart of the System: Prisms (BaK-4 vs BK-7)
Inside, the light is folded by prisms. Their quality is paramount. You will often see the terms BaK-4 and BK-7. In summary, for the best astronomy binoculars, BaK-4 is a must. It is a barium crown glass with better optical density. Why? It allows for more uniform light transmission and, crucially, a perfectly round and full exit pupil. With lower-quality BK-7 prisms, you risk seeing the edges of the exit pupil appear as a grayish diamond shape when you slightly move your eyes away, especially in low-light conditions. This is lost light, and faint stars that escape you. Frankly, for serious use, BK-7 is to be avoided.
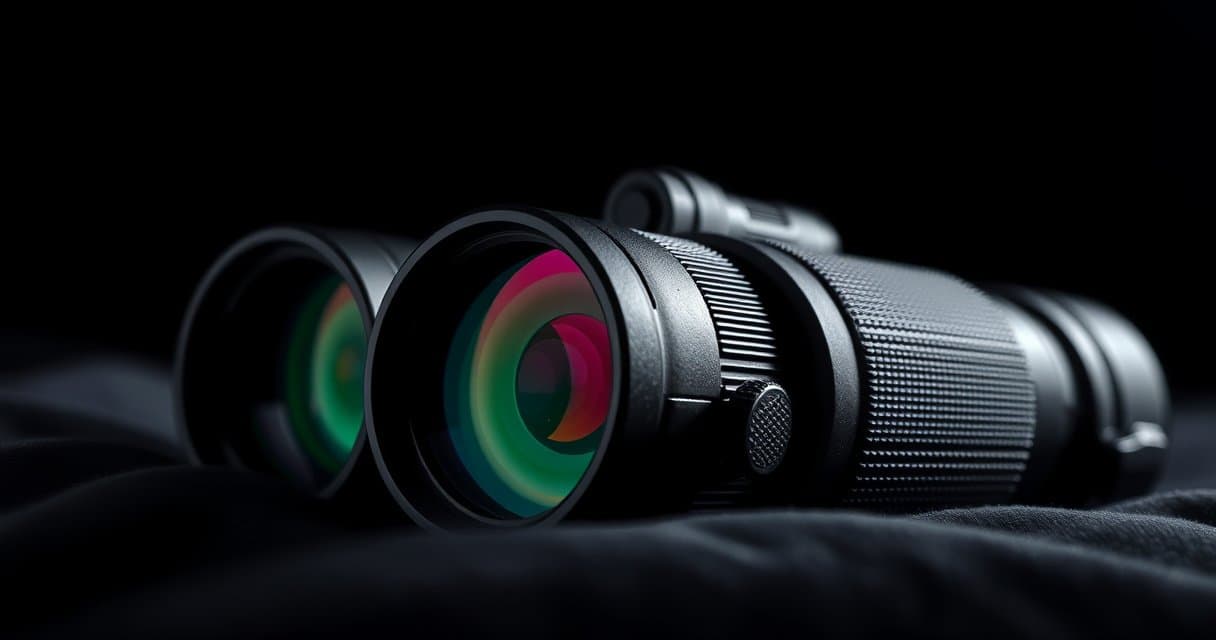
Coatings: The Key to Clarity
Look at the lenses. Are they bright white, like a mirror? That's a bad sign. You want them to show subtle colored reflections – green, magenta. That is the signature of multi-coatings. These microscopic anti-reflective layers are applied to every glass surface. Their role? To prevent light from reflecting inside the tube and being lost. The more layers there are, and the more they are applied to all surfaces (then referred to as "Fully Multi-Coated"), the better the transmission. On a black sky, this translates to superior contrast, sharper stars against a darker background, and an absence of botherable parasitic reflections around bright objects like the Moon. It's an investment that is immediately visible.
ED/HD Glass: For a Truly Black Sky
Do you sometimes see violet or green fringes around the edges of a high-contrast object? That is chromatic aberration. To combat it, manufacturers use Extra-low Dispersion glass (ED or HD). These special glasses focus different colors of light to the same point. The result? The edges of the Moon are sharp and white, without a colored halo. Stars are perfect points, not little iridescent blurs. For demanding planetary or lunar observation, it's a real plus. Note: it's not magic, and excellent multi-coated optics without ED glass can already deliver fantastic results. But if your budget allows, ED glass is the hallmark of ultimate image sharpness.
Our Selection
Whether you're a beginner amateur astronomer or looking for a tool to enhance your terrestrial observations, choosing the right binoculars is crucial. Today's selection highlights two models with radically different philosophies: powerful zoom binoculars for astronomy and long-distance observation, and a pair specifically designed for navigating the starry sky. Let's analyze their technical specifications and what the community says to help you see things more clearly.
| Product | Magnification | Objective Lens Diameter | Field of View | Key Features |
|---|---|---|---|---|
| ESSLNB Astronomy Binoculars 13-39X70 | 13x - 39x (Zoom) | 70 mm | 288 ft/1000 yards | Powerful zoom, smartphone/tripod adapter included, very bright |
| Omegon Astronomy Binoculars 2.1x42 | 2.1x (Fixed) | 42 mm | 26° (Very wide) | Extremely wide field, bright eyepiece, compact and lightweight |
ESSLNB Astronomy Binoculars 13-39X70
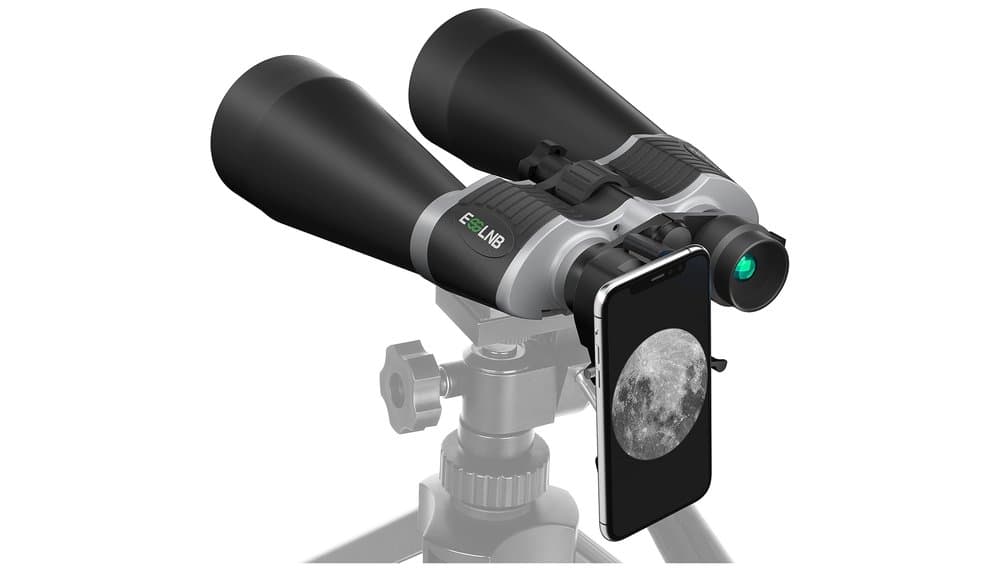
On paper, the specifications of these ESSLNB binoculars clearly state their purpose: this is a powerful and versatile instrument, designed for those who want to push magnification. With 70 mm objective lenses and a zoom covering 13x to 39x, they promise to bring lunar details or distant birds significantly closer. According to user feedback, brightness is indeed an appreciated strong point, thanks to the large objectives and multi-coated optical treatments, allowing for observations in low-light conditions.
Versatility is another major argument. The kit is complete, including a tripod adapter, almost essential for stabilizing the image at high magnification, and a smartphone adapter enabling digiscoping (image capture). Reviews point out that this accessory, while sometimes requiring a bit of patience for perfect alignment, is a appreciated feature for sharing discoveries.
However, the community also notes concrete limitations. The weight (1.23 kg) and bulk make it discreet equipment, best reserved for seated observation sessions. Above all, several reviews indicate that at maximum magnification (39x), the image can become less sharp and more difficult to stabilize, even on a tripod. This matches a realistic expectation: pushing zoom to the extreme often involves compromises on clarity. Finally, the diopter adjustment (to correct the difference between the two eyes) is sometimes described as a bit sensitive, requiring careful handling.
Omegon Astronomy Binoculars 2.1x42
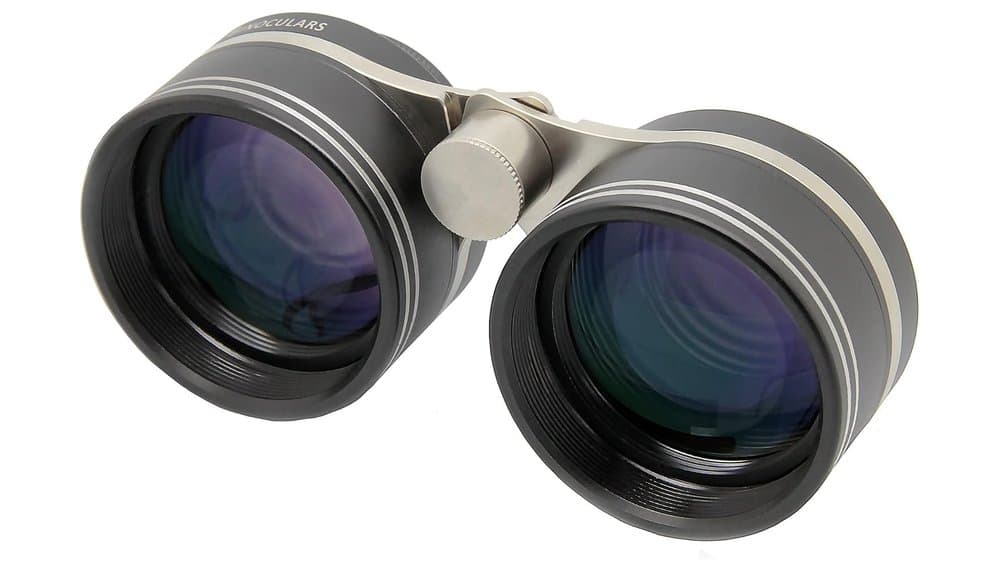
In contrast to the first selection, the Omegon 2.1x42 adopt a radically different approach, focused on orientation and the overall view. With a very low fixed magnification of 2.1x and an exceptional field of view of 26°, these binoculars are not made for zooming in on a detail, but for embracing vast portions of the sky. Their primary purpose is to help the amateur navigate among constellations and locate objects before observing them with a more powerful instrument.
The specs and reviews agree on their strengths. Their compactness and lightweight design make them an ideal field companion, easy to slip into a bag. The bright eyepiece is specifically designed for nighttime observation, enhancing star contrast. The amateur astronomy community praises this specialization: these binoculars perfectly fulfill their role as a stellar "finder," offering a natural and immersive view of the starry sky, without image inversion.
Their limitations, however, are inherent to their design. Their usefulness is very specialized. For classic daytime observation (birds, landscapes, sporting events), a magnification of 2.1x is often insufficient to offer real added value compared to naked-eye vision, despite the mention of these uses in the description. Furthermore, although they are designed for tripod mounting, the necessity is less given the low magnification which minimizes shake.
Conclusion: Two Tools for Two Distinct Uses
Our analysis based on technical characteristics and community feedback outlines two very distinct profiles. The choice is above all a question of need.
Choose the ESSLNB 13-39X70 if you are looking for a versatile, high-magnification tool for planetary/lunar astronomy or detailed terrestrial observation (birdwatching), and you are prepared to use a tripod to fully enjoy its capabilities. It's a complete "all-in-one" kit that covers many scenarios.
Turn to the Omegon 2.1x42 if your priority is deep-sky observation and orientation in the vast stellar expanses. Their wide field and bright design make them a specialized and effective tool for amateur astronomers, complementary to a telescope or more powerful binoculars. It's the tool for immersion and celestial navigation.
Matching Magnification/Aperture to Your Usage
Now that you know how to read the numbers and judge lens quality, you must make the most personal choice: which combination truly matches your way of observing? It's not about pure performance, but practical compromise. A pair that's too heavy or too shaky will stay in its case, even if its specs are impressive.
The Universal Classics: 7x50 and 10x50
For many enthusiasts, this is the ideal starting point. 7x50 models offer a wide field of view (often around 7°), a generous exit pupil of 7.1 mm perfect for the dark-adapted eye, and remarkable handheld stability. They are perfect for navigating the Milky Way, observing vast star clusters like the Pleiades, or even for daytime marine or terrestrial use. 10x50 models sacrifice a bit of field of view and stability, but they bring you closer to details: lunar craters gain relief, Jupiter's four main moons are easier to distinguish. It's the best compromise for versatile and regular use. If you could only have one pair, I would personally lean towards the 10x50 for that little extra power that makes a difference on compact objects.
The Bright Giants: Beyond 50 mm
Here we enter the domain of the best astronomy binoculars for deep-sky observing. Models like 15x70 or 20x80 are true light collectors. Their large objectives (70 mm, 80 mm) capture many more photons, revealing faint nebulae and distant galaxies that a 50 mm won't show. But beware, it's a different world in the field. Weight increases quickly (often 1.5 kg and more), and the increased magnification makes shake unbearable without a solid tripod. This is no longer equipment you take out for a quick, impromptu session; it's a setup. If you have a stable garden, a good tripod, and a passion for deep-sky objects, they are unparalleled. Otherwise, they risk discouraging you.
The Trap to Avoid: The Race for Excessive Magnification
Beware like the plague of models like 25x100 or worse, 30x80, sold at low prices. The number is impressive, but it's often a trap. High magnification with a relatively small objective yields a tiny exit pupil (3 mm for a 25x80!). Result: the image is dim, the field of view is a keyhole, and the slightest amplified vibration can make you feel sick. For magnifications beyond 12x or 15x, you absolutely need a proportionally large objective diameter to maintain a decent exit pupil AND a mandatory tripod. A good rule of thumb: if the magnification exceeds the objective diameter divided by 5 (e.g., 15x70 is fine, 25x70 is not), ask yourself some questions.
Your final choice will depend on your natural stability, your willingness to use a tripod, and what makes you dream: sweeping across wide star fields or scrutinizing the details of specific objects.
Specifics for Observation Comfort
You can have the brightest binoculars in the world, but if the experience at the eyepiece is uncomfortable, you won't go back. Comfort is what transforms a technical instrument into a true observing companion. It depends on details often underestimated at the time of purchase.
The Eyecup and Diopter Adjustment: For Eyeglass Wearers and Others
If you wear glasses, this is a non-negotiable point. Check that the eyecups are long enough and fold back completely. Without this, your field of view will be narrowed as if you were looking through a tunnel. For everyone, the diopter adjustment is crucial. It allows you to compensate for any potential difference between your two eyes. The correct method? Close your right eye (or cover the right objective lens), focus on a star using the central focusing wheel with your left eye. Then, close your left eye and use only the diopter adjustment (often on the right eyepiece) to obtain a sharp image of the same star. Once done, don't touch it again! On entry-level models, this adjustment tends to move on its own, which is truly annoying.
Weight, Balance, and the Tripod Perspective
You've chosen a nice pair of 15x70? Bravo for the brightness. Now, can you hold them for more than two minutes without your arms shaking like leaves? The weight and its balance are paramount. Two binoculars can have the same total weight, but if most of the weight is towards the objective lenses (which is often the case), they are much more tiring to hold than if the weight is well distributed. That's why it's essential to try them in hand, even briefly. And if you use a tripod—which I highly recommend from 10x50 upwards for prolonged sessions—check for a solid tripod mounting point, usually a 1/4" thread on the body. A little tip: invest in an "L-plate" type adapter that secures the binoculars by their central axis. It's much more stable and comfortable than screwing them in from underneath.
The Details That Make the Night: Handling in the Dark
Observation happens in complete darkness. Can you find the focusing wheels without having to turn on a flashlight that will ruin your night vision? Textured and well-differentiated focusing wheels are a real plus. The stiffness of the interpupillary distance adjustment also matters: it shouldn't loosen on its own when you bring the binoculars to your eyes. These small ergonomic points make a huge difference in the field and are often characteristic of the best astronomy binoculars, as their designers know you will use them in these extreme conditions.
Finally, think about the cold. If you observe in winter, icy metal focusing wheels are torture. Some models offer rubber-coated wheels, which are much more pleasant. These elements, which don't appear on the spec sheets, are nonetheless decisive for moving from a taxing observation session to a moment of pure pleasure.
Maintaining and Protecting Your Equipment to Make It Last
You have invested in a good pair of binoculars for astronomy, perhaps even in what are called the best astronomy binoculars for your budget. This instrument deserves care that goes far beyond a simple wipe with a cloth. Poor handling or inadequate storage can completely negate the optical quality you patiently chose. Protecting your equipment means protecting your long-term observing pleasure.
Cleaning: The Golden Rule is Restraint
The first and most important rule: clean as little as possible. Every wipe on a lens, even with the best intentions, risks microscopic scratches. Your best tool is not a liquid, but a blower or a very soft-bristled brush to gently dislodge dry dust before any attempt at wiping.
If fingerprints or smudges persist, only then should you use a microfiber cloth dedicated to optics. For stubborn stains, apply one to two drops of a lens cleaning fluid to the cloth, never directly onto the lens. Wipe using very gentle circular motions, from the center outward. Frankly, absolutely avoid cotton fabrics like t-shirts, paper tissues, and especially using your breath to "moisten" the lens: you will just deposit residue and acidic condensation.
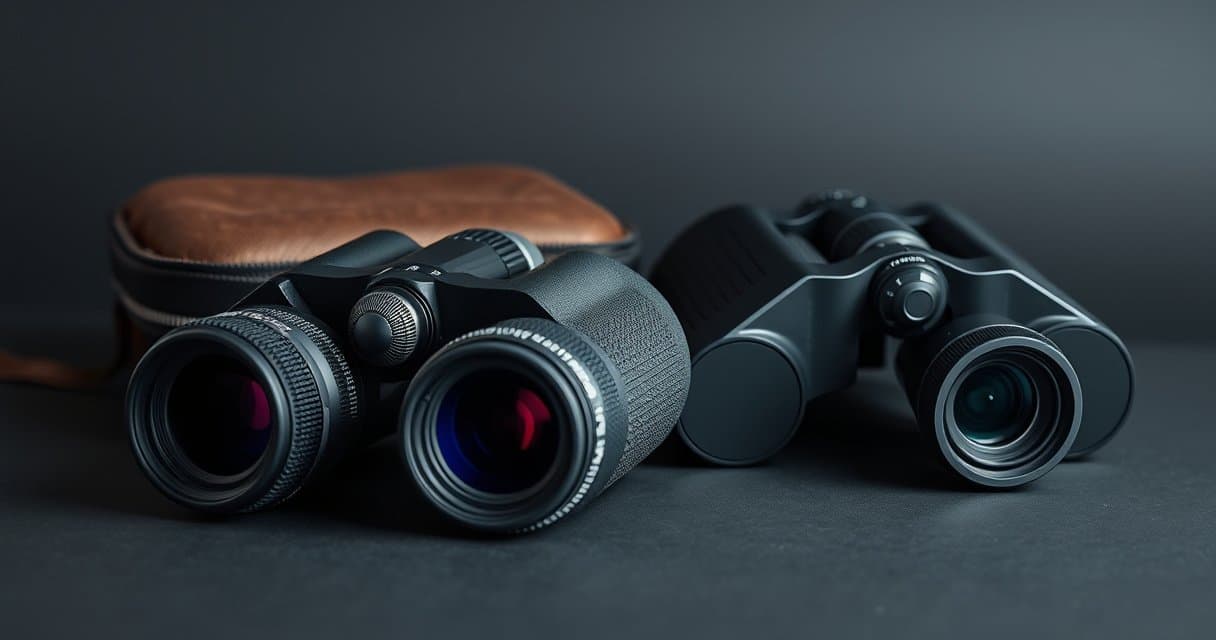
Storage and Protection from the Elements
When not in use, your binoculars must absolutely live in their case. It is not a marketing accessory; it is armor against shocks, dust, and direct sunlight which can, over time, degrade certain coatings and seals. Before storing them, ensure they are at room temperature and completely dry, especially if you observe on a cool night. Condensation that forms when bringing them into a heated house must evaporate naturally before sealing them away.
The ideal is to store the case in a stable place, protected from excessive humidity and large temperature variations. A closet in a living area is much better than a garage or basement. If your binoculars are waterproof and nitrogen-purged, never attempt to unscrew the optical parts yourself: you would break the waterproof seal and the internal anti-fog protection.
Daily Handling: Actions to Avoid
A few simple reflexes preserve mechanical integrity. Always replace the objective and eyepiece caps when you are not looking. When adjusting the interpupillary distance, never force it: hold the central body with one hand and adjust each tube with the other, without twisting them like chicken wings. Avoid leaving the binoculars with the objectives pointed toward the sun, much like a magnifying glass: the concentrated rays can damage the coatings and, in extreme cases, melt internal plastic parts.
Finally, if you use them with a tripod, never carry the assembly by holding only the tripod head, letting the binoculars dangle. Always detach them for transport. These common-sense practices will ensure your stargazing partner remains performant and reliable year after year, without unexpected repair expenses.
Conclusion
By choosing your astronomy binoculars with care, you open a window to the universe. You now understand the key numbers, the compromises, and the details that make the difference.
Apply this advice. Opt for a model suited to your real needs, not just the promises of advertising. Take good care of them.
The sky awaits. Go outside, and look up.
Frequently Asked Questions
What magnification should I choose for observing stars?
For handheld observation, a magnification between 7x and 10x is ideal, as beyond 12x the image becomes too unstable without a tripod.
What is the best exit pupil for astronomy?
An exit pupil between 5 and 7 mm is ideal, calculated by dividing the objective lens diameter by the magnification, to match the maximum dilation of your pupil in the dark.
Which binoculars for astronomy should a beginner choose?
The 10x50 binoculars are the best versatile choice for beginners, offering a good balance between power, brightness, and handheld stability.
What is the difference between BaK-4 and BK-7 prisms?
BaK-4 glass prisms are superior for astronomy as they ensure a perfectly round and full exit pupil, unlike BK-7 prisms which can cause light loss and less contrasted images.
Is a tripod necessary for astronomy binoculars?
A tripod becomes necessary from a magnification of about 12x (such as with 15x70 models) to eliminate shaking and fully benefit from the power and brightness of large objective lenses.
100% free and independent — All our articles are written independently, without any sponsorship. We may earn a commission on purchases made through our links, at no extra cost to you.
Guides you might like

Astrophotography Telescope Buying Guide
Choose the right telescope for astrophotography to avoid frustration. Key factors depend on your target nebula or object.

Best Binoculars Value Guide
Find value binoculars that match your real needs. Understand specs like 8x42 and key features for the best observation without overspending.

Best Nature Binoculars Kids
Discover how to choose the perfect first binoculars for a child, focusing on lightweight design, ergonomics, and sparking a love for nature observation.
Articles you might like

Zoomion Genesis 200-800 EQ-4 Telescope Review
Large 200mm aperture at a low cost. We review the Zoomion Genesis 200-800 EQ-4 Newtonian telescope to see if it's right for ambitious astronomy beginners.

Coolifepro SV-TCQW WiFi Trail Camera Test
Coolifepro SV-TCQW WiFi trail camera review: analyzing its specs, user feedback, and performance for modern, connected wildlife surveillance.

Bushnell Legacy 10x50 Binoculars Review & Test
Review of the Bushnell Legacy 10x50 binoculars. Analysis of its versatility, robustness, and optical quality for various observation activities.